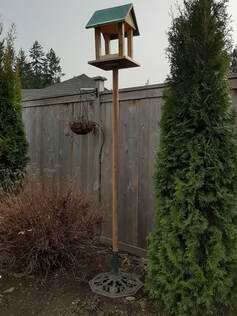
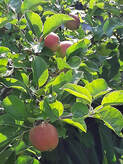
 What is it about birds that bring such immense joy? As we watch them go about their daily lives they seem to evoke a sense of wonder in us. Through thoughtful observation they have a way of helping us destress and lift our spirits. Having always enjoyed nature and wildlife we decided a fun project to brighten these late winter blahs would be to add a bird feeder that we could view from our window. Not wanting to spend money on this project, we used an old umbrella stand with a 6 foot pencil post (tree post), and scraps of wood from previous projects. Building the Bird Feeder Keeping it simple we provided a roof to protect the food, and a flat base that the birds could easily perch upon. The 2in (5cm) sides are enough to keep the food in. This project was to be budget friendly so we used 3 screws to attach a 4x4 in (10x10cm) piece of wood to the pole and then screwed the birdhouse to the wood piece. To give it a birdhouse look we filled the sides of the roof and drilled a small hole at the front. All in all, a fun, easy and inexpensive project. 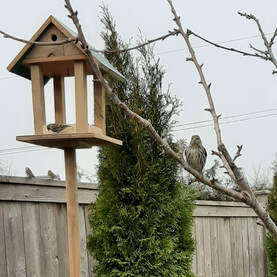 Feeding the Birds
Attracting the birds to the feeder didn't require much, although I have heard it can take time for birds to know your feeder is there. We were lucky, I purchased a large bag of wild bird seed and filled the base. I made sure to include their favorite black oil sunflower seeds and stayed away from bird feed with poor fillers such as crack corn and milo as these can cause health issues for some birds. By dinner we were enjoying the fruits of our labor. We have had an array of small birds coming and going. We have seen Dark-eyed Juncos, Sparrows, red-breasted nuthatches, Swainson's Thrush, Spotted Towhees and Robins . To my delight there always seems to be a few birds at the feeder. Keep the Birds Safe If you are planning on making your own bird feeder, keep in mind safety for the birds. Make sure that there is someplace nearby that the birds can quickly fly to for safety. It is recommended to place feeders 12 feet (3.65 meters) from safety. This could be a bush, tree, hedge or brush pile. Make sure that the bird feeder is either close enough that they slow down before colliding with the window, or far enough that the window doesn’t create a confusing reflection of the feeder. It is important to keep the feeder fresh and clean by cleaning on a regular basis and providing fresh seed at least every couple of weeks. This keeps the birds safe and healthy for everyone to enjoy. Birdwatching provides us with a tangible contact with nature. Building a birdfeeder in the backyard allows us to bring nature to us. By feeding birds on a regular basis, birds learn to come to that spot every day and as more birds learn, the numbers of species and individuals increase. Your bird feeder can provide immense enjoyment, and your very own bird sanctuary. Happy birding!
0 Comments
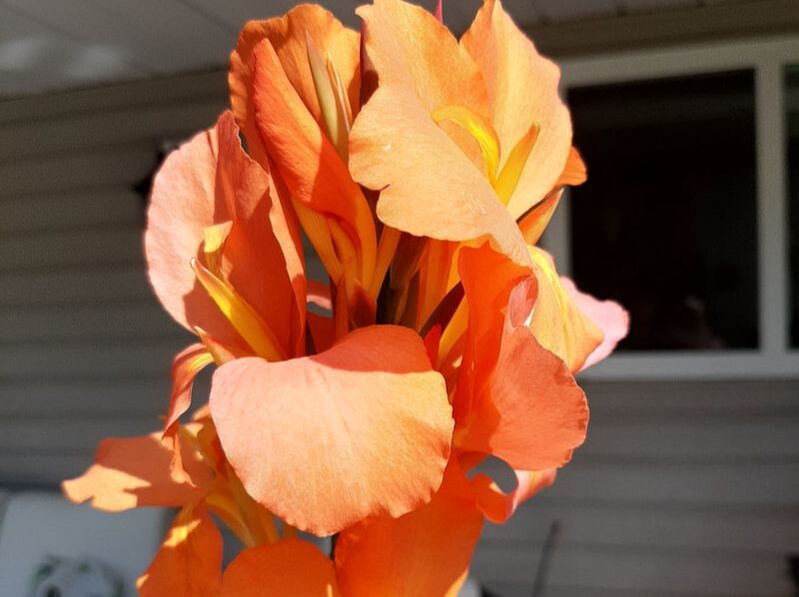 Canna Lilies are beautiful, striking plants with their dazzling flowers and large tropical looking leaves. They add a lot of impact to any planter or flower garden. They are perennials in zones 9 or higher, but are treated like an annual for most climate zones. I happen to live in an 8b zone and they do not survive our winter. As beautiful as they are they can be pricey if you purchase them year to year, so it's nice to know you can either grow them from their rhizomes or by seed. Rhizomes are simply fleshy underground stems that grow horizontally in the ground. Along with Canna lilies, bearded iris, ginger and bamboo are plants multiplied by rhizomes. You can pull up the plants at the end of the season and collect their rhizomes and store them in a bucket with newspaper in a dark cool place that doesn’t freeze. Another way of propagating is by seed, but not all produce seeds. Canna lilies that are hybrids sometimes do not produce seeds and when they do they are not predictable in their outcome. They can take on any characteristics of one of the parent varieties. However, they are worth growing from seed as they still produce beautiful plants. Once the flowers fade seed pods begin to form. Initially, they will be green and fuzzy, eventually turning brown and crisp. This is when you want to collect the seeds. If you try to collect the seeds while the pods are still green they will shrivel up. You may find some are brown and some are black. It is the black seeds that you want to collect and keep. The brown ones do not store well. 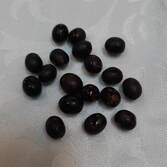 The seed collecting is the easy part. It is growing them from the seeds that can be quite tricky. The seeds coating is very tough and requires a few steps to get them to germinate. Canna Lily seeds could take weeks or months to germinate if you just plant them. Therefore, they require a little help to improve the germination rate. Step 1 Scarification - the rubbing off of a bit of the seed coating by using something coarse such as a file, sandpaper, nail clippers (I found clippers too difficult), or scraping across a grater. Step 2 Soaking- allow the seeds to soak for at least 24 hours in warm water. Some recommend a few seconds in boiling water then quickly cooling it down to lukewarm then letting them soak, Others suggest using hydrogen peroxide at a ratio of 1 part hydrogen to 15 parts water to help soften the outer coating. Whichever method you choose soaking aids in the germination rate. Once prepared, the seeds should be planted into a seed growing medium and kept moist maintaining a temperature between 70-80F (21-26C). Once they start growing they will need to be transplanted one or two times before putting out into the garden or outdoor pots. By planting my seeds in 4” pots I only transplant them once more into 6” pots and then outdoors after there is no danger of frost.  If you are looking for flowers during the summer you should plant them early. I start my seeds in February, but you can start them as early as January for guaranteed summer blooms. Last year I had one germinate in the summer and it only grew to be about 10” tall. I potted it into a 6” pot and brought it in for the winter. It has done well and will have a head start on this year's Canna Lilies.
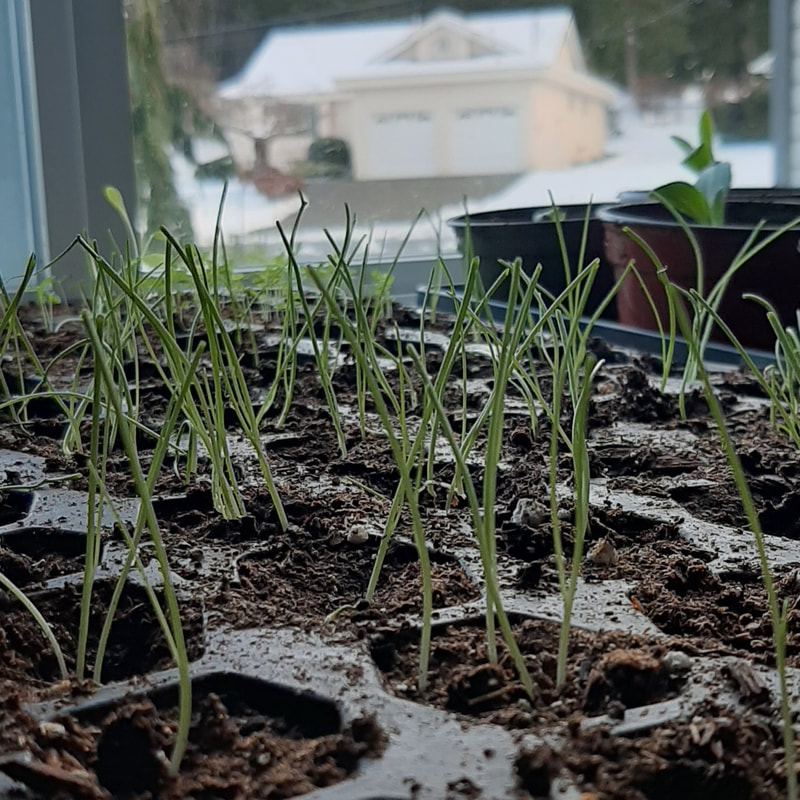
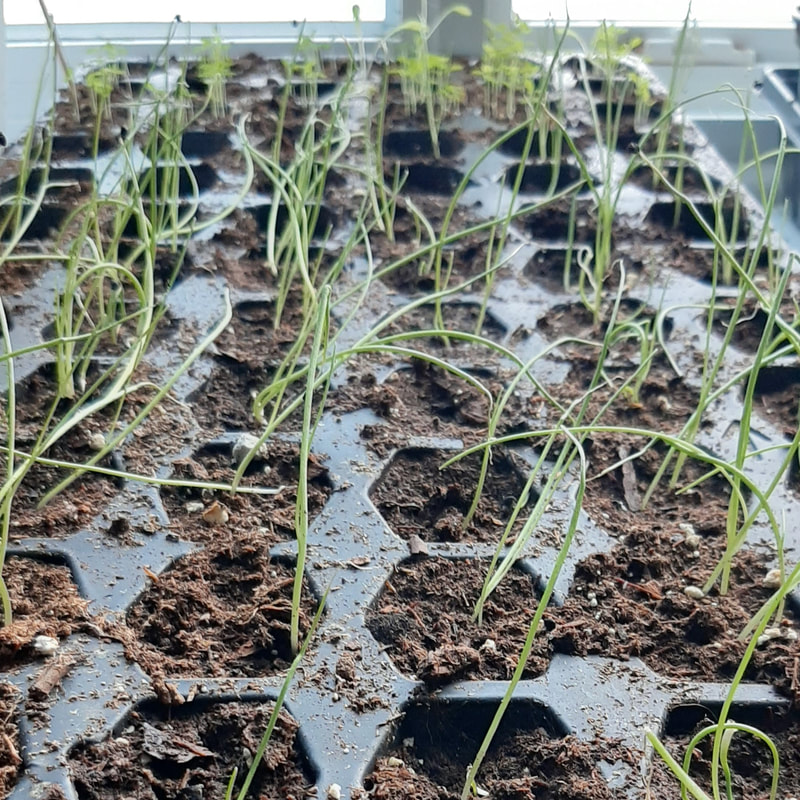
Canna lilies are a beautiful addition to your home or garden with their tropical-like leaves and long lasting colorful flowers. Once planted they are a low maintenance show stopper to be enjoyed throughout the season. Happy gardening! 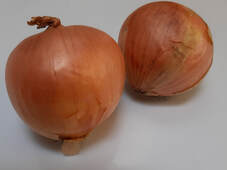 Onions are slow growing, but well worth the wait. If you can grow onions from seed, I would highly recommend it. You will not only save money, you will also have more variety to choose from and produce larger onions. Cost The cost of seeds vary depending on the variety you purchase, but there is about a 50%-80% savings on seeds over using bulbs. Where the real savings comes in is when you collect seeds from your own onions. Make sure you purchase seeds that are not hybrid. This means they should say heirloom, or open-pollinated. Which just means the seeds will grow the same plant as the one you collected from. Varieties You will find come spring every market, garden center and grocery store will carry onion bulb sets. They are usually labeled white, red or yellow rather than by variety name. The concern here is onion varieties have different day-length requirements. They are divided into 3 different categories: 1. Short-day Onions- They form bulbs as soon as the days reach 10-12 hours in length and are best for the southern hemisphere. 2. Long-day Onions- They form bulbs when days reach 14 hours in length and are best for the Northern hemisphere. 3. Day-neutral or Intermediate-day Onions- They form bulbs when the days reach 12-14 hours in length and are best for those closer to the equator. Therefore it is crucial to check an onion's day-length requirement or recommended latitudes before you buy, because day length affects how and when onion forms bulbs. Also, your soil type and amount of sun can influence how well the onions grow. For example: One of the onions I like to purchase is Early Yellow Globe Onion. It is highly recommended for gardeners in short season climates that have problems with onions maturing, heavy soils, or anyone wanting an early storage onion, and is well adapted to Canada. This is a good variety for me to grow since I live on Vancouver Island which is Southern Canada. My soil is part clay, which I am amending but is still heavier than it should be. Being able to grow my onions from seed allows me better options for my area. Larger Bulbs Since the onions are grown from seed they have the opportunity to grow larger. Onions are bi-annual which mean the second year they want to form flowers. Therefore, there is a higher probability of purchased bulbs flowering than onions grown from seed. Once they want to flower the energy then goes into flowering and stops the bulb growing process.
There is More There are also a few other things you can do to ensure larger onions and reduce the chance of your onions bolting and flowering.
If you do choose to grow your onions from sets, many of the above points are still important to ensure good onion growth. Keep in mind the day-length requirement, and make sure that the onion bulbs are smaller around ½” in size. The reason for this is that the bigger onion sets stop growing and go to flower sooner than the smaller onion sets.
I have grown my onions from bulbs and from seeds and do prefer growing from seed. I have more choices and more control over how my onions grow. Overall I have a greater chance of success. Happy gardening! Looking to expand your garden experience? Try adding artichokes to your vegetable or flower garden. Great for their delicious buds, and interesting color and texture, or if left to bloom for their gorgeous flowers. However you choose to enjoy these plants you will be rewarded. VARIETIES Artichokes can be divided into globe and elongated. There are several varieties with the most common being Green Globe, Big Heart, Baby Anzio, Violetta, Siena and Imperial Star to name a few. There are 2 other types that people hear of which are not true artichokes; they include the Chinese artichoke and the Jerusalem artichoke. The Chinese artichoke is actually from the mint family and you eat the wormlike rhizomes of the plant. While the Jerusalem artichoke is from the daisy family and the tubers similar looking to ginger root are the part you eat. 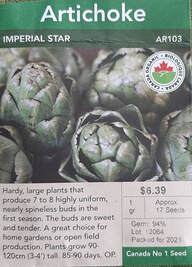 IMPERIAL STAR My focus is on the Imperial Star. Most artichokes take a long time to mature from 150-210 days, which can make growing artichokes a little more difficult, especially if you have a short growing season. The Imperial star has a much shorter length of time, reaching maturity in 85-90 days. Making this variety one of the most popular artichokes for the home gardener. It is a perennial that will produce for several years before it needs replacing. Easy to grow from seed and provides an immediate first-season harvest. ABOUT The plant grows to be 36-48”(90-120cm) tall and produces 7-8 varied size buds that are 2-4”(5-10cm) wide. They will require some space and it is recommended you plant them 3 feet(1m) apart. The seeds are open-pollinated, and therefore you can get seeds that will breed true. Meaning you will get plants roughly identical to the original plants. They need full sun and grow ideally in zones 6-9 (zone 5 with mulch and cloche cover). 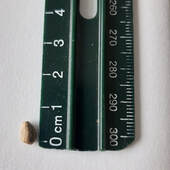 STARTING SEEDS Start seeds late January to early February. Start the seeds in 4” pots to allow room for their long roots. The seed company recommends 2 per pot, with a 94% germination rate. I planted 1 per pot with an 89% germination rate. In other words, I planted 18 pots and 16 have germinated. Keep them moist in a warm place until the seeds germinate in 7-21 days. The cooler the area the longer they take. Continue to keep them watered well and repot them as they grow. Six weeks before the last frost date, start hardening them off by gradually exposing them to the outdoor elements. Plant them directly into the garden 2 weeks before the last frost date. Artichokes need a 2 week cool period below 10C (50F) to encourage flowering, but will not survive hard frost. 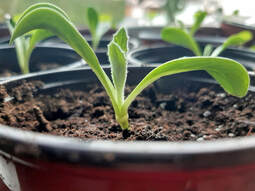 GROWING PLANTS
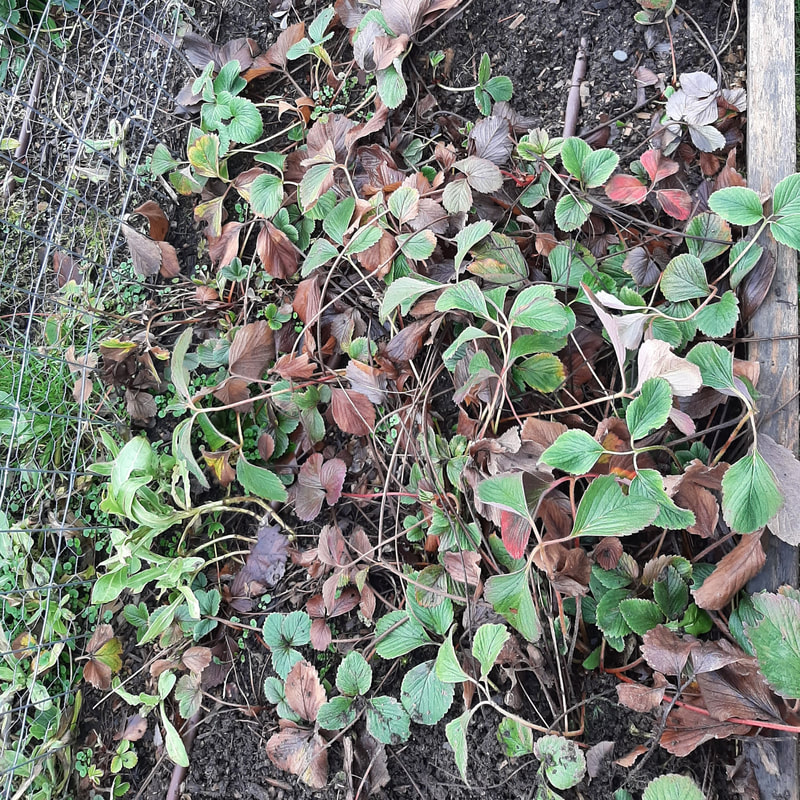
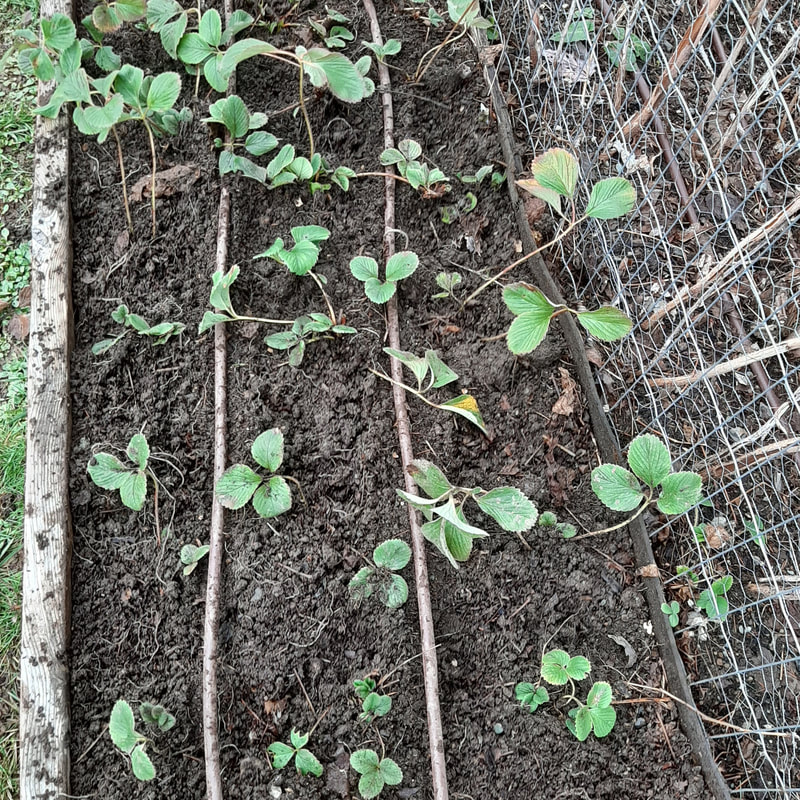
Select a sunny, sheltered location with well-draining soil. Prepare the soil by digging in lots of compost or aged manure. Good artichoke companions are peas,cabbage, sunflowers and tarragon. Do not plant with heavy feeders such as tomatoes and potatoes, or anything that the large artichoke plants would shade that require full sun. A month after planting water well with a high quality compost or comfrey tea as artichokes are heavy feeders. As older leaves wither, gather and compost them. HARVEST You should start seeing upright stems with artichoke flower buds by mid to late summer. Once the lowest scales on the bud begin to open, but the top is still tight it is time to harvest them. Cut the buds with 2” of stem attached. Immediately refrigerate them, and don’t wash until before you are ready to cook them. They will keep 1-2 weeks in a perforated bag or container. For long term freeze whole washed artichokes that have been steamed until just done. COLLECTING SEEDS Choose a large bud from a favorite plant and let it stay and bloom and then shrivel and brown. Cut the dried flower and keep it in a paper bag for 2 weeks. Remove and shatter it to gather the seeds. PREPARE FOR WINTER Where the ground barely freezes, these plants may overwinter if covered with a heavy mulch. In late October cut the plants to 6” tall, and mulch well to keep the roots from freezing. Uncover in April. Now that you know that you can grow artichokes. Try growing a few as an addition in your perennial bed(s) or vegetable garden. You not only can enjoy the silvery green foliage it adds to the garden, or the beautiful flowers if left, but when eaten you will be delighted by such a yummy treat! It is too early in the season to be doing a lot in the garden, so now is the time I start cleaning up my beds, compost and prep for the new season. One of my garden projects is cleaning up the strawberry and green onion patches in preperation for my crop rotation. I haven’t seeded new green onions for the past 4 years. They are a wonderful crop that just keeps giving. The strawberries are another great crop which produce runners that create new plants. I cut the new plant from the main plant and replant them into the new bed along with previous strawberry plants that I can get another crop out of. I remove any plants that are questionable. Everything gets cleaned up and there is room for new growth.
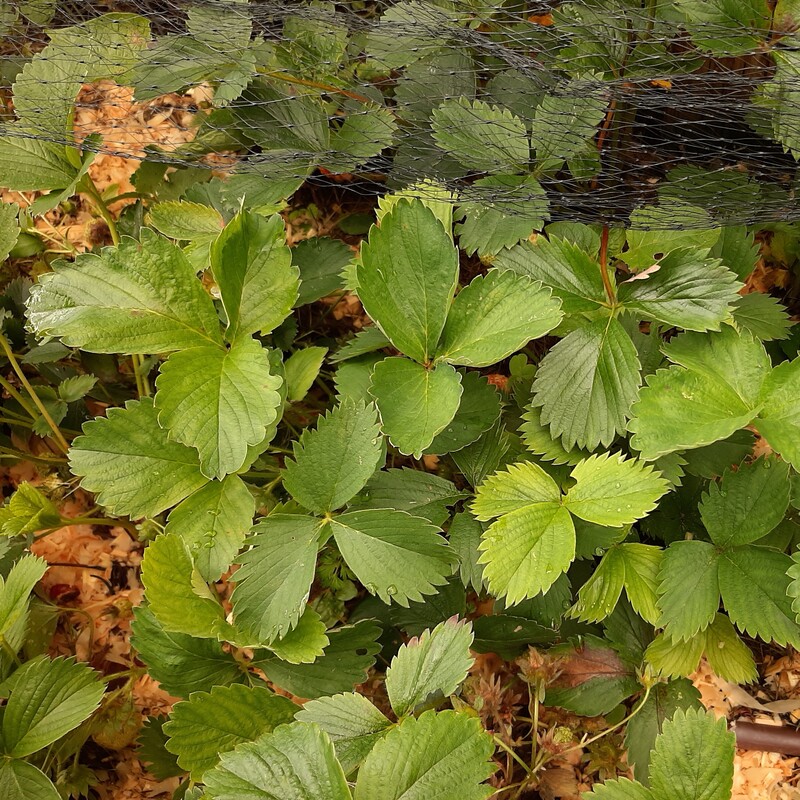
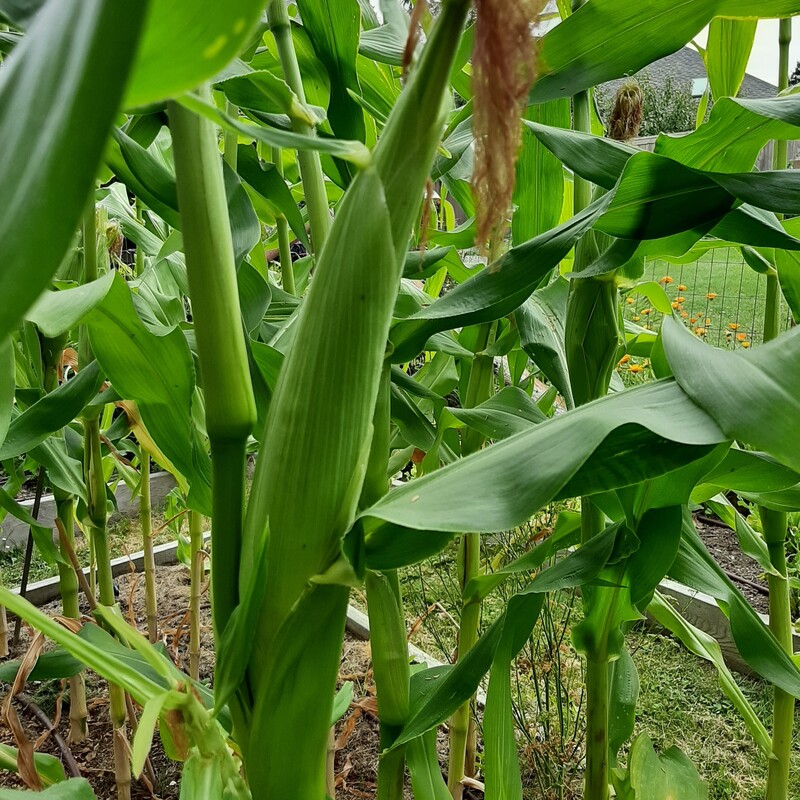
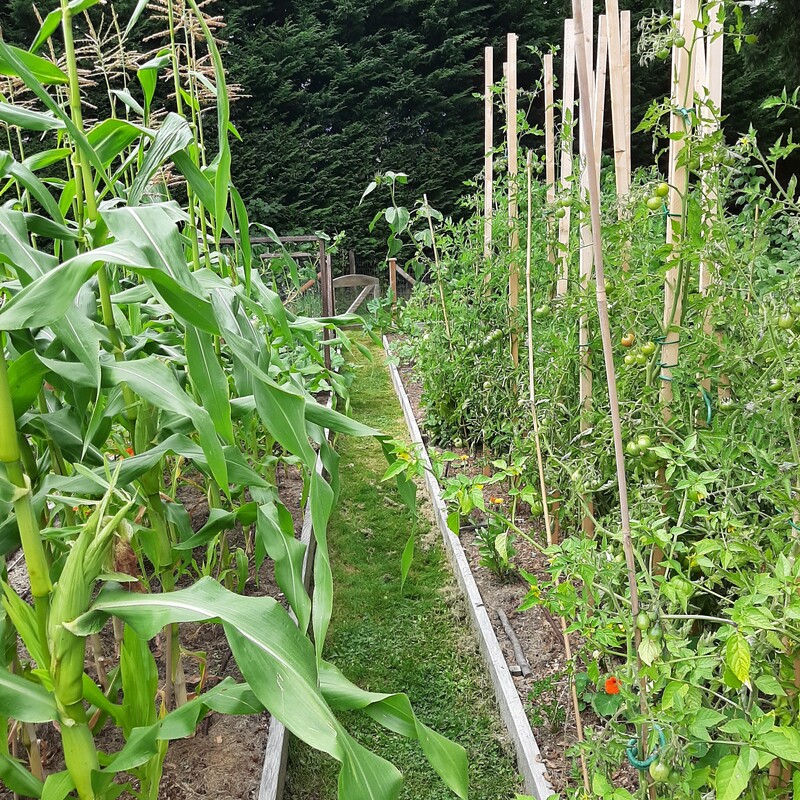
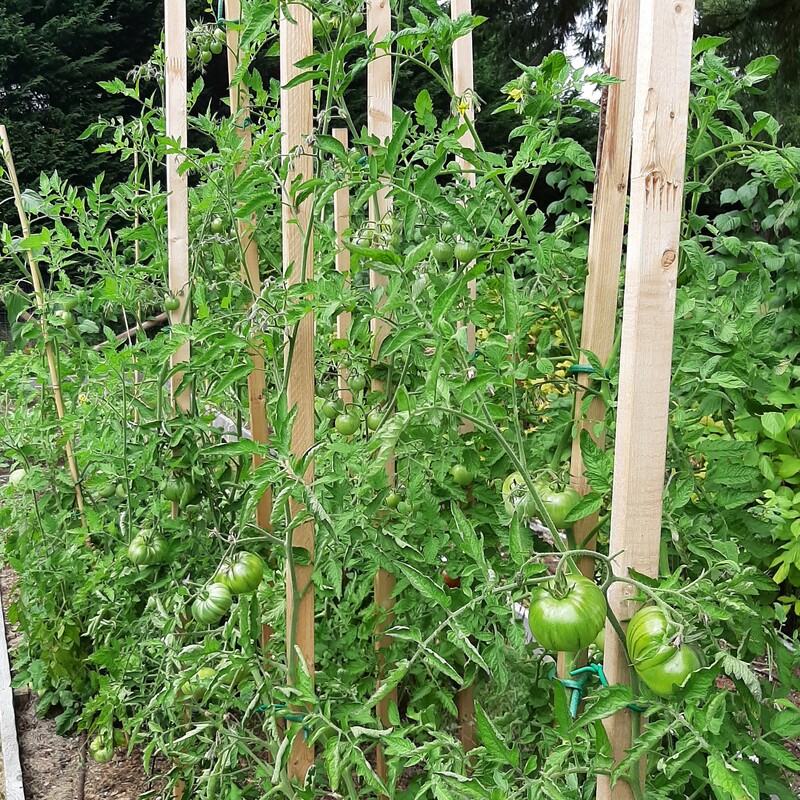
Strawberries, To Move Or Not Move This process of moving everything is a little time consuming and made me think, do I really need to move my strawberries? I have a 4 year rotation that I follow, but will vary as needed. These beds are 50 feet long and I divide them by having the warmer crops to the front and cooler crops to the back. Current Crop Rotation Bed A Tomatoes, peppers and potatoes. The potatoes are replaced with beans, beets and zucchini for a fall crop. Bed B Peas, Beans, cucumber and squash, and strawberries Bed C Corn, pumpkin, beans, cabbage cauliflower and broccoli Bed D Roots, onions, carrots, beets, radishes, spinach, lettuce I tuck in a variety of lettuce wherever there is a blank spot to ensure a constant supply of greens throughout the season. Has this worked? It has for most of the crops, but I have had to make some adjustments because of how the beds are positioned, width of beds, and hours of sun for certain areas. I have 2 foot outer beds that I cannot grow my corn in, therefore I can only rotate between the 2 main beds and will grow corn every other year. That is what works with my crop rotation. Should I take a chance and just alternate between the 2 main beds? It would mean looking at the other crops as well With the focus on maintaining healthy soil more garden rules are being broken including the idea of crop rotation. Many urban farmer's gardens are smaller and therefore it allows for some flexibility that large farmers may not get. Some are using alternative ideas such as cover crops, and relying on the addition of compost and organics to provide all the nutrients
Rotating of crops, is it necessary? British gardeners Charles Dowling and Luw Richards, are strong advocates of the no dig method of gardening, adding 1-2” of compost, intercropping and mulching. The overall idea, and result is feeding the soil. They have come to believe that crop rotation for the most part is not necessary. Or if you are rotating crops to rotate only every 3-4 years. I believe as a beginner gardener, just as a beginner cook, you should initially follow all the tried and true rules. These are what teach you what has proven to work over a long period of time. Once you have gardened, or cooked for a while you learn what goes well together and more of what doesn’t work. This is where the experimenting and creativity comes into play. I used to sell cookies in a market and would create my own recipes. With experimenting I learned to consistently create cookies that were soft, yet chewy. I learned that too much baking soda or powder made a cookie cake like. Not enough liquids created cookies that were to dry and crumbly. If the dough was the right consistency, the cookie would turn out everytime. This rings true for bread making, and so much more. Yet, if my oven is at the wrong temperature or the air is too cool or too warm, the end result can be affected. I believe gardening is not much different. Over time you learn what good soil looks like, and what soil balance works best for each type of plant. Some plants prefer more acidic soil, others alkaline and for most vegetables neutral. Some plants are heavy feeders, some give back. The soil temperature, amount of sun, wind, water etc. all have an effect on how the plants will thrive. We are learning that we need to be taking a big picture approach instead of worrying only about crop yields. This is why we see such a large movement towards regenerative agriculture and permaculture. These principles Look at how everything interacts together and how we can improve and sustain these interactions. We do this by knowing which plants work well with each other (companion planting) and which do not.  For instance, intercropping, the permaculture principle of growing 2 or 3 crops together, can have many benefits. We see this with the overused example of corn, pumpkins and beans. Another combination is tomatoes, basil and marigolds. Other vegetables that grow well with tomatoes are beets, carrots, bush beans, lettuce radishes, marigolds, or onions. Avoid spinach since both use a lot of nitrogen. By intercropping there is a complimentary sharing of resources, more diversity, weed suppression, and a greater yield.
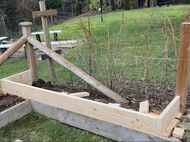
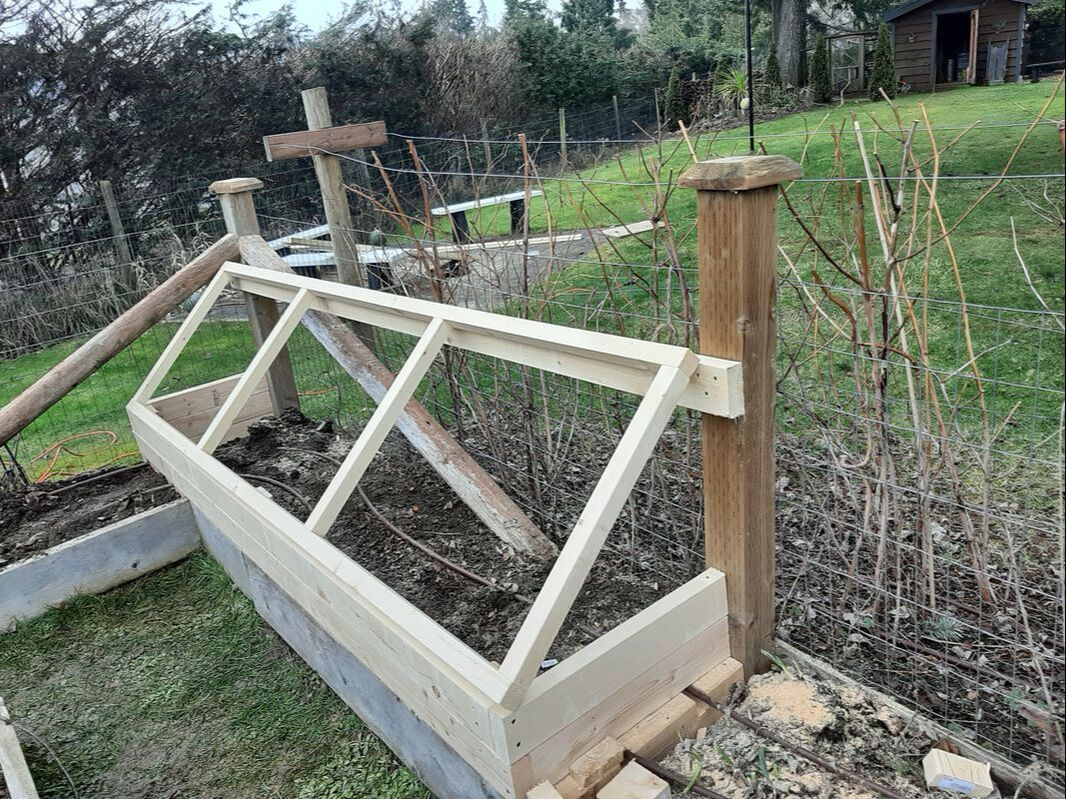
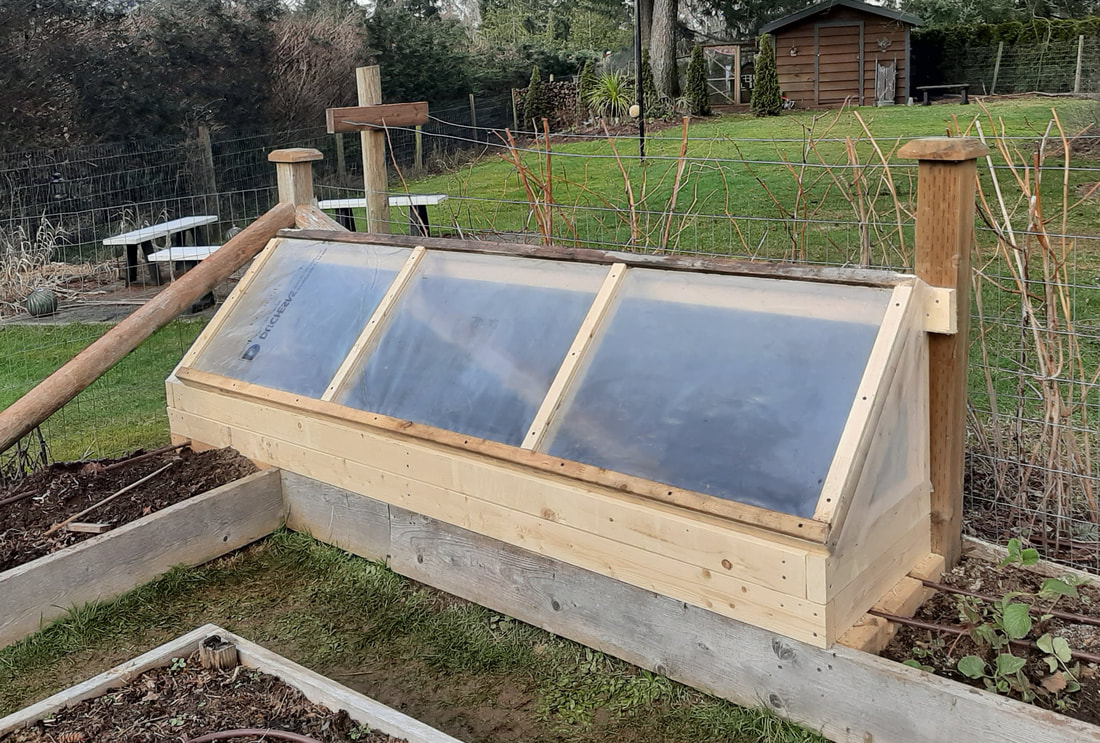
These are things we learn as we garden. As a beginner gardener crop rotation can be an easy way to begin. Research has shown that, even with the same fertility levels, significant yields can be achieved through rotation. Crop rotation has been known to prevent disease, help with pest control and help the soil with retaining important nutrients. It has been tried and proven. However, as you learn about companion planting, mulching, good compost and how your garden works you may find crop rotation is just one way of gardening and for some an integral part of gardening. Where others may find the combination of no dig, feeding the soil with compost paired with a real mulch of wood chips, straw or leaves provides the healthy soil plants need to thrive. Our role is to tend, care and maintain a relationship of balance. There isn’t a one size fits all way of gardening. There are too many variables. The important part is to observe and interact with your garden. By taking the time to engage with nature we can design solutions that suit our particular situation. In the past we have placed a hoop house over the garden to protect early plants before transplanting them into the garden. This worked well but was a little awkward to work with. This year I wanted something a little more fixed with a sturdier door to open and close. Therefore, we decided to build a cold frame at the corner of our garden facing south for best sun exposure.
 Moving Plants to a Cold Frame A Cold Frame is handy when you wish to start seeds a little earlier but need to protect them or harden them off before planting into the garden. Even if the temperatures are cooler the protection a cold frame provides, enables you to harden off your plants earlier. It is probably best to wait until the plants have at least 2 sets of true leaves (these follow the first 2 seed leaves) before moving your plants into a cold frame. When transferring to the cold frame you should wait until a stretch of 10 days to 2 weeks where the temperatures don’t fall below 35F to move them out. Once hardened off they will be fine even if the temperature drops after this period. Before trying to start seeds or transfer seedlings into a cold frame you should make sure the temperature is warm enough for them. A cold frame temperature can range between 3-10 degrees difference from the outside temperature depending on how insulated it is. At the same time, if there is no sun the temperature difference in the soil can be the same from inside to outside. This is an issue where I live here on Vancouver Island. We have a much milder climate, but we also get a lot of clouds through the winter. Once in a cold frame monitor the temperature in the cold frame and be prepared to whisk them back in if the temperatures suddenly change for the worse, and start slowly venting the frame during the warmest part of the day, slowly opening it up a little more each day to help harden them off. You will know that your plants are doing well as you see new growth and thicker darker leaves. Importance of Soil Temperature If seeding in early spring focus on cool-season plants as they are hardier and can handle cold weather temperature changes. However, vegetables germinate best at warmer temperatures so it is often best to wait. For instance, Peas will germinate in soil that has a temperature of 40F, but peas germinate at a higher rate and faster in warmer soil around 65F. Therefore, your seeds can go from 70% germination rate to 100% germination rate. Also, later plantings will usually catch up to early plantings, especially if you have a cool wet spring. You can refer to the following chart for a better understanding of the difference soil temperature can make. 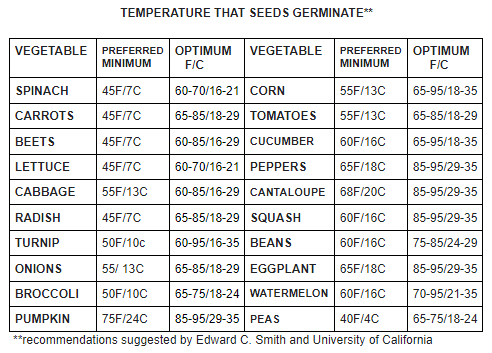 Note: Most vegetables take 3-4 weeks to germinate at minimum temperature and a week or less at the optimum temperature. The shown minimum is preferred low, as some can germinate at a lower temperature but the germination is very spotty.
What has worked best for me is starting slow growing seedlings such as, artichokes, onions,celery, peppers, tomatoes, cucumbers, and squash inside, and bringing them out to the hoop house, or cold frame 2 weeks before I plant them into the beds. This saves me from having to take them in and out everyday. For other crops such as lettuce, broccoli, cauliflower, cabbage, I will start them inside the cold frame for the often recommended 4-6 weeks before last frost date. The protection of the cold frame allows me to start earlier and the plants are much stronger and hardier than if I were to start them indoors. A cold frame is a friendlier place where plants can grow faster and healthier than in your unprotected garden beds. It can be a place to hold cold hardy vegetables such as spinach or other greens in the winter. A place for hardening off plants for the season, and in the summer a mini greenhouse for heat-loving plants. You won’t know what you have been missing until you have one. Happy gardening! 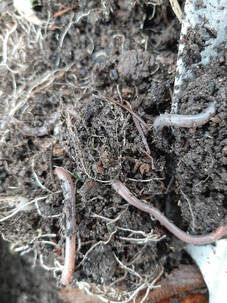 Good soil is crucial to good gardening. Organic gardening is becoming more common with many gardeners who have come to understand that we need to support nature and not go against it. We must return as much to the soil, or nearly as much as we take from it by feeding the soil not the plant. The top 5-10 inches (13-25cm) is the most important and highest concentration of organic matter and microorganisms. This is where most of the soil activity occurs. Therefore, we need to be providing matter that will sustain and feed these microorganisms. We can do this by mulching, leaving roots and old growth especially during the winter, and feeding the soil with good compost. 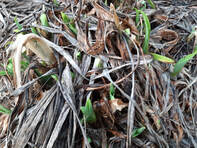 Mulch A healthy organic garden uses mulches. The best garden mulches are those that the property produces itself. If we return all leaves trimming and grass clippings to the soil this will increase soil biodiversity and the soil will naturally become more balanced. According to Texas A&M University, "a well-mulched garden can yield 50 percent more vegetables than an unmulched garden space, thanks in part to mulches’ ability to reduce foliage and fruit diseases.” As the season comes to an end and the leaves fall off the raspberry plants, fruit trees and other bushes they are left to protect the plants and feed the soil through the winter. It is not until late winter to early spring that I will remove any unwanted debris from the garden as I replace it with compost.  Roots Plant roots feed your soil microbes and soil microbes feed your soil. By cutting back the plants just above the soil surface and leaving the roots from the old garden plants you provide a source of food for the soil organisms. If you are heading into winter you can even lay the above ground parts on the soil as a mulch and a habitat for beneficial insects and organisms. Roots not only take up nutrients they store them. Legumes store large amounts of nitrogen, but all roots have some form of nutrients in them. Why remove them when they can return those nutrients back to the soil. The only reason to ever remove roots is if they carry disease, the less disturbance to the soil the better. 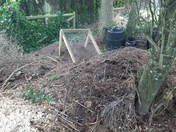 Compost
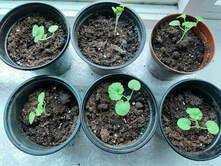
A Compost pile is a rich source of microbes. Deliberately constructed it is a breeding ground for microbes. It is a combination of layers of browns and greens providing both carbon and nitrogen, with the addition of just enough water to dampen it. To provide needed air to the compost you may need to turn the pile. The more it is turned the quicker it will decompose. Well aerated, mature compost looks dark, has a pleasant, earthy odor and will contain an incredible amount of microbes. This rich man-made resource provides a balanced source of nutrients for the plants and helps restore soil biodiversity. When compost is in short supply, compost tea is a great alternative for injecting the soil with microbes. It can also be used as a spray on leaves to protect them from disease. The quality of the compost tea is only as good as the quality of compost. Our goal as gardeners is to cooperate with nature by maintaining a healthy ecosystem for our plants by treating our soil as a thriving ecosystem that we enrich through feeding the soil microbes and organisms. Healthy, happy soil means a healthy, happy gardener!  Many gardeners have grown geraniums from cuttings, but geraniums can easily be grown from seed, they just need some time. Not really having a place to store geranium plants for the winter I usually start mine from seeds. This is truly a winter project since geraniums are slow growing and can take a few weeks. If you wish to have flowers in early to mid May, the seeds should be started by the end of December. Seed growing varieties are smaller than those propagated by cuttings, but have more flowers. They also tend to be more disease resistant and heat tolerant, which are all good reasons to start your geraniums from seeds. You can start your seeds in small trays, but you will need to move them to 4” pots once they have 2 sets of true leaves. The first leaves you see are their seed leaves, then their true leaves follow. I prefer to start my geranium seeds in 4” pots and only transfer them once straight into the garden. This doesn’t work for all plants, since many plants do better starting in small pots. This is because the small root systems of newly germinated seeds require both oxygen and water. The wet and dry periods created by watering seedlings in small pots creates an ideal environment for the young roots. Newly germinated geraniums do not like their soil to dry out between watering so it is possible to start them in 4” pots. Geraniums can take as little as 3 days to germinate and as long as 2 weeks. My first few were up in 3 days and then the others have been coming gradually from there. 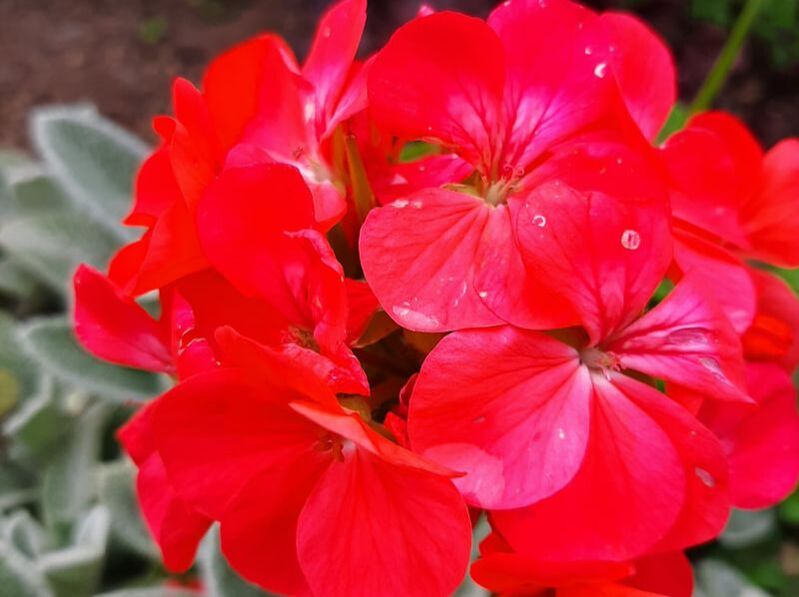 To have success growing geraniums here are a few steps to follow: 1. Fill your pots with moist potting soil. Place one seed in each pot and just cover the seed with ¼” moist soil. 2. Maintain a temperature between 72-76F/22-24C for germination and to promote rooting. Excessive temperatures over 85F/29C will not allow the seeds to germinate. Until you see the first seed leaves keep it somewhere warm by using a seed starter mat, or keeping it on top of the dryer or fridge. I have had success just putting it on top of my dryer and then once the seed leaves appear moving the plants to a south facing window. 3. Do not allow the soil to dry out between watering during the beginning growth of your new plants. The plants should be kept wet but not saturated during germination. This stress can detract from later performance. 4. Once you move your plants to a sunny window or under grow lights, you can start feeding them a diluted fertilizer mixed at ½ normal strength. 5. Gradually reduce the temperature to 62F/17C over a 6-8 week period before putting them outside to harden off. Low temperatures under 55F/13C will not allow the buds to open.  GATHERING SEEDS
Geraniums are a little trickier when it comes to gathering seeds. You must know where to look and watch very carefully, because one minute they are there and then they are carried away by the slightest breeze. Look for the part that looks like a stork or crane’s beak, at the base of this is where you will see the seeds. As the seed head dries, the outer part of the stem will start to curl up bringing with it the seeds to be dispersed. To collect the seeds you can remove the seed part when it starts drying up and let it continue to dry inside keeping it protected in a paper bag for a couple of weeks, or you can wrap a paper bag or mesh around the seed pod to keep them from blowing away when they are ready. Make sure they are completely dry before storing them to prevent mildew forming. Most geraniums from garden centers may not go to seed. In this situation you are better to grow new plants from their cuttings, or store them in a dry warm place for the winter. If you have never tried growing geraniums from seed I recommend ordering some seeds or picking some up from the garden center and try growing your own. You will be impressed with how easy geraniums are to grow. Just remember to start them early so that they have enough time to flower for the season. Otherwise, you may find it is fall before you see any blooms. I have had this experience and it was nice to see them for the fall, but I could have enjoyed them from late spring on. Always learning!  We have been getting an incredible amount of rain, which makes getting outside hit and miss these days. Also, when the ground is so wet from winter storms, it can cause more damage to be out digging in the garden than good. Soil can become badly compact and take years to recuperate. For those in much colder climates the ground is frozen and there really isn’t much you can do unless you are lucky enough to have a greenhouse. This makes January a great time to plan and organize, even begin starters for cooler crops or slow growing flowers.  Ordering Seed ordering for me begins in December, and I get excited when they come in. Others order seeds even early to avoid their favorite variety being out of stock. For many, January is when they chose to order. There is still plenty of time to order, but you will notice a few seeds out of stock. When ordering I start with reviewing my own collection of seeds, using as many of the seeds collected from the previous year. Then I order what I don’t have enough seeds for and of course, something new to try. I have been purchasing heirloom seeds for the past couple of years with the intent of being more sustainable. Now that the seeds are here it is time to plan!  Planning Once I pare down what I am going to grow, I plan my garden on a blank copy of my vegetable plot, which further helps me narrow down what I can and cannot grow. My garden design closely follows a 4 year garden rotation so that I am not depleting the same nutrients out of my soil. I say "closely follows" because the soil areas, amount of sun etc. vary from one section to another and I have had to be creative in how I plant the garden. By continually adding compost to my garden I hope to see less variations. The vegetable beds were designed to not only be productive, but visually interesting. However, I have found that it is hard for rotating crops and I should have created 4 equal beds with a 4 foot width rather than a combination of 2 foot and 4 foot beds. I do prefer no larger than a 4 foot bed width for ease of gardening, and I can grow pretty much anything including corn, which does much better in at least a 4 foot bed. I have tried less but the end result was shorter stalks and smaller corn.  Seeds Now that I have that organized it is time to start seeds. I organize my seeds by the month so I know which ones I need to to start. Always referring back to my journal to make sure I am not starting seeds too late or too early. For instance, last year was my first year growing my own tomato plants from seed, and I learned for this year I had started my tomato transplants a month too early. It had also been a while since I tried growing geraniums and I learned that I should have started December 20th for May flowers, as it is I am just getting to them this week. You think you will remember, but it is amazing what you forget. When was your first tomato, pepper ripe? How about your squash? A journal can prove to be just as important as good soil. 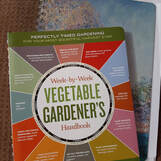 Journaling
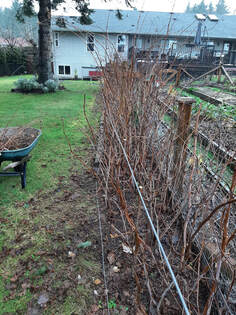
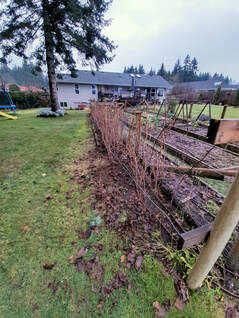
Our Hardiness zone is 8b, and our frost free date is April 26th. These dates are very helpful, especially when you're a beginner gardener. Most seed packages will give you a date of when to start seeds or direct plant based on your frost date. Knowing your frost free date enables you to work backwards from the date suggested and determine planting and plant starter times. Your hardiness zone will help you determine what vegetables, fruits and flowers do best in your area. If you are unsure where to begin I would recommend Ron and Jennifer Kujawski book, “ Week-by-Week Vegetable Gardener’s Handbook” It has useful tips and helps you with tracking what needs to be done and when to do it. It also has a place for journaling so you can keep track of how everything has worked so that you can improve your crops. Other guides that can be useful for planting are vegetable, fruit and flower planting charts from your local seed company. Thinking ahead and planning your garden can save time and money. It allows you to be more organized and helps you to prepare yourself and your garden for the upcoming years tasks. You know what you are going to plant and when. It can also, get you excited for a new year. Happy gardening!  Winter is a great time to prune your trees and bushes if you live in a cold climate. All your fruit trees and bushes are dormant, with no leaves, flowers or fruit. You can prune anytime between November and February, although many orchardists prefer late winter. Why? You can still easily see the structure of your tree, and you can rest assured knowing that spring is not far off and your tree will soon be able to heal those wounds you have created from making those cuts. Summer pruning can have some benefits, the growth has slowed down and it can give you an opportunity to reduce the size of a larger tree such as a cherry tree, which is known for extreme growth during the season. This can also be the time to remove any broken, crisscrossed or diseased branches. Still allowing time for the healing process of your cuts before winter sets in. If you live in a cold climate you should avoid pruning in the fall since there will not be an opportunity for the cuts to heal, leaving it susceptible to disease and pests. Whenever, or however you choose to prune, know that not everyone will prune the same way- not even the experts. If you still feel nervous remember some pruning is better than no pruning at all. I say this because pruning seemed a little daunting at first, to the point that it took me a bit to attempt it. Therefore, I wanted to share a couple of guidelines that have made it easier for me to get out there and do something. My trees and bushes consist of 3 apple trees, cherry tree, fig tree, plum tree, peach tree, 3 grape vines, raspberries, and 10 blueberries. We purchased and planted everything within the first year of moving to our home, excluding the plum tree which we found sadly neglected. This will be our third winter and we can see how important it is to prune our trees if we want to control the size and direction they grow, prevent disease and provide an opportunity for our trees and bushes to regenerate themselves. 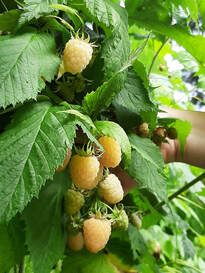 RASPBERRIES I love raspberries, but left unpruned, raspberries are their own worst weed. When canes get overcrowded, they compete for sunlight, causing the shaded leaves and buds on the lower half of the plant to die. Without those buds, you’ll have fewer fruiting branches and a much smaller crop. Crowded canes also compete for nutrients and water, which leads to small, poor-tasting fruit. And the shady, moist conditions around a dense thicket are a magnet for fungal diseases. Pruning raspberries This is what I follow when pruning my raspberries for the new season. 1. I start by cutting down my raspberries just above the top wire, which brings it down to about 4 ft. They recommend anywhere between 4-5ft. 2. I remove anything that is outside of my 2 foot bed to keep it easier for picking and so they don’t start growing in my grass or vegetable garden. Trust me they are not picky on where they grow. If not maintained they will be everywhere. 3. Then I look for obvious weak or broken canes and remove them. 4. Finally, I will remove last year's old canes. I do this in 2 stages the first time I just cut out the obvious ones. The second time is when the canes are just sprouting new growth, the old canes are obvious and I remove what is left. Pruning is the most effective way to avoid problems. A yearly thinning allows plenty of sunlight and air to penetrate the bramble, which means you’ll have bigger, healthier crops and a much easier time picking those sweet berries.
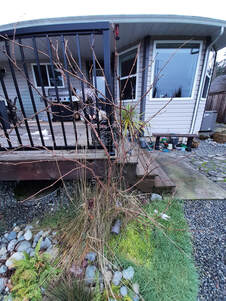
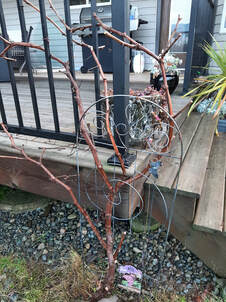
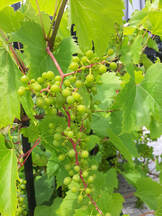 GRAPES Did you know the fewer grapes there are the sweeter and better tasting they will be. Less is more. Grapes should always be pruned in the winter when the grape vines are dormant. In the winter it is safe to get rid of ⅓ of the overall grape vine. This gives the plant a chance to concentrate on new growth and be more productive. Grape vines have one main stem, called the leader, and the laterals (aka. arms, cordon) grow off the main shoot and sub-lateral grow off the laterals. The fruit grows off of the laterals and sub-laterals. My messy gape vines really needed some pruning. I left them alone until this winter and probably should have pruned last year to help train them better. In the winter it is safe to get rid of ⅓ of the overall grape vine. This gives the plant a chance to concentrate on new growth and be more productive. Pruning grapes Probably the most confusing for me was understanding pruning grape vines. Why? I think it could be the terminology that confused me, whatever the reason, what I want is a simple explanation. Here is what I understand. There are two main ways of pruning: cane pruning and spur pruning. When unsure of what you have, use the cane pruning technique. Cane Pruning Technique
With spur pruning you want to leave 3 buds coming off the branches with no more than 30-80 buds total for the whole plant. Spread them out about 4-6 inches apart. Cut all the stems pointing down keeping the ones that point mostly up or straight up. I hope that is explained in terms you understand. If you are off a bit don’t worry, the main concern is to not prune when it isn’t dormant.
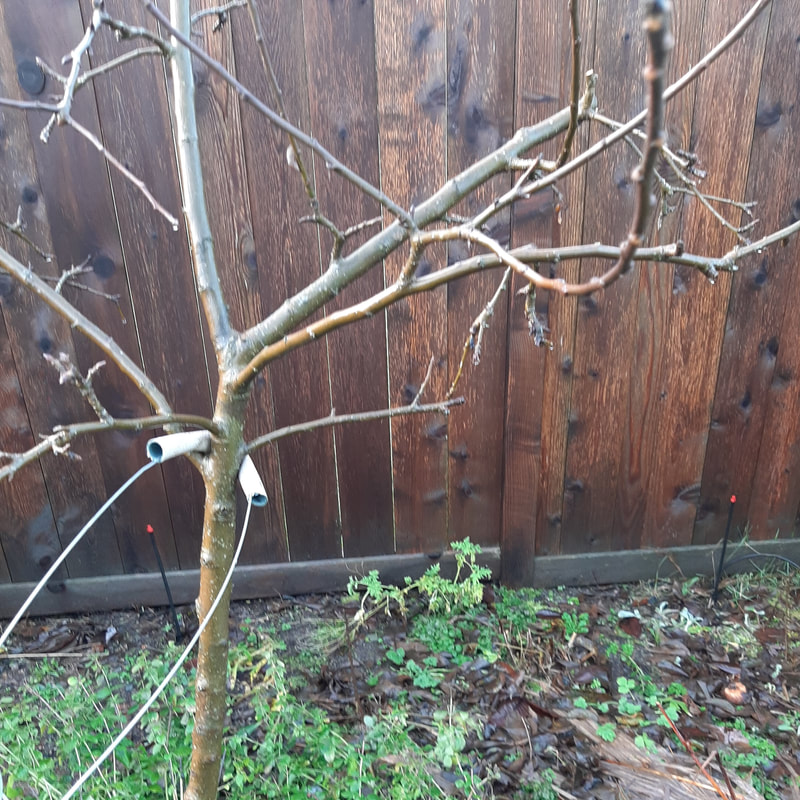
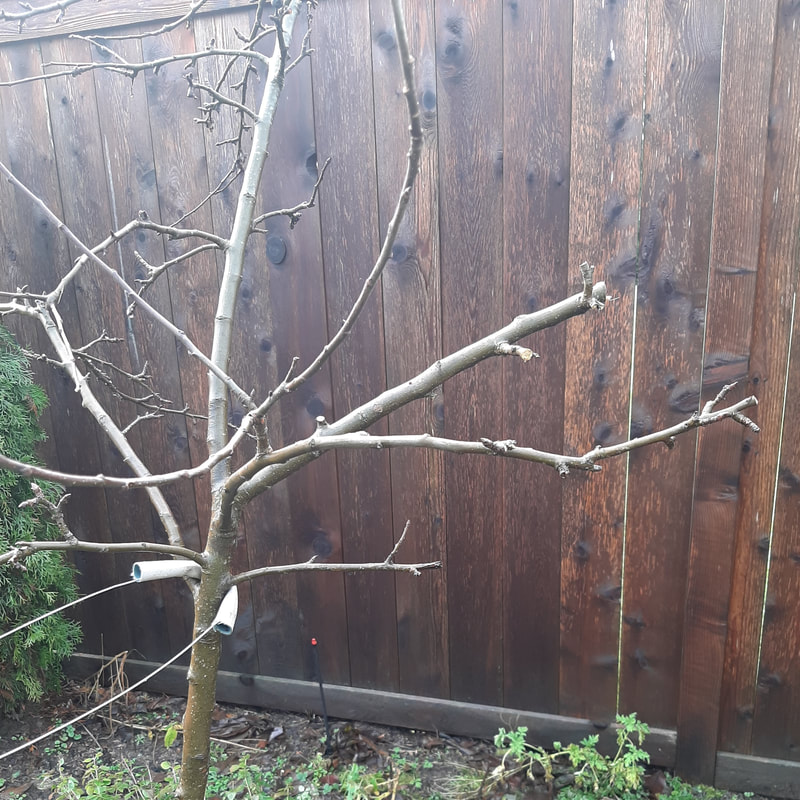
 FRUIT TREES There are 3 main reasons you should prune your fruit trees: their survival, stimulation and shaping. In the best interest of your tree, it is preferable to do some pruning versus no pruning. For example, peach trees left unpruned may stop bearing fruit. Here is the simplest way I found to remember what needs pruning.
There is a lot of information these days out there that can walk you through the steps of pruning, therefore my goal was to share what works for me. I don’t claim to be an expert in pruning trees, but I have found by following these guidelines I am able to control and manage my trees and bushes. Happy pruning!
|
AuthorDebbie Hall Archives
March 2021
Categories |
 RSS Feed
