|
0 Comments
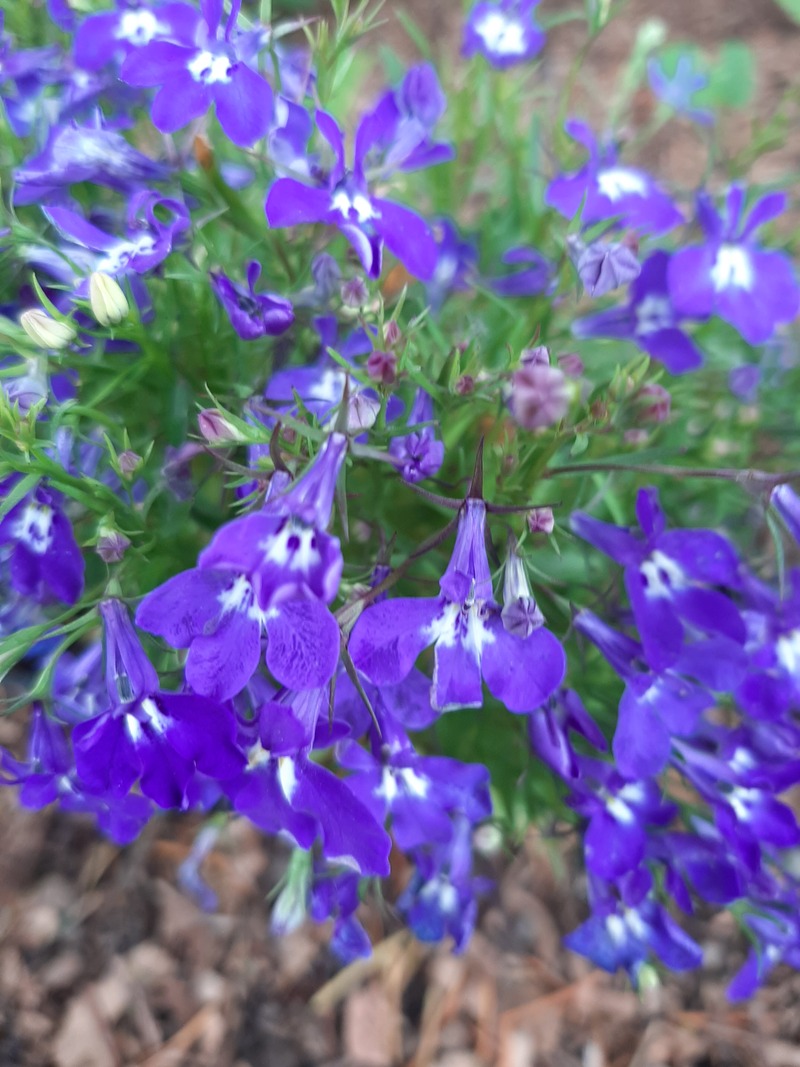
 Sweet William with its tiny blooms will be cut back to the leaves once each grouping of flowers are spent Sweet William with its tiny blooms will be cut back to the leaves once each grouping of flowers are spent Even with healthy plants you will eventually need to deadhead. Deadheading is relatively simple. As the plant's flower is spent, finished blooming, pinch or cut off the flower stem below the spent flower back to where there is a new lateral flower or bud. If there is no new flower cut back to a lateral leaf. The lateral leaf, flower or bud is anything growing off the main stem. When there are many tiny flowers, I find it is much easier to just shear them back rather than trim each individual flower. They usually will give you a second flowering before or into fall. A few examples include plants such as: *Lungwort *Dianthus *Lobelia *Alyssum *Lavender Roses can bloom all summer long, if deadheaded religiously. As individual blossoms are spent you can trim them back to the main stem, and then remove the whole stem after all the flowers on that particular stem are finished.
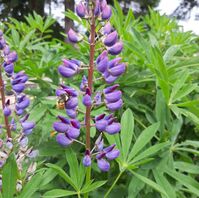
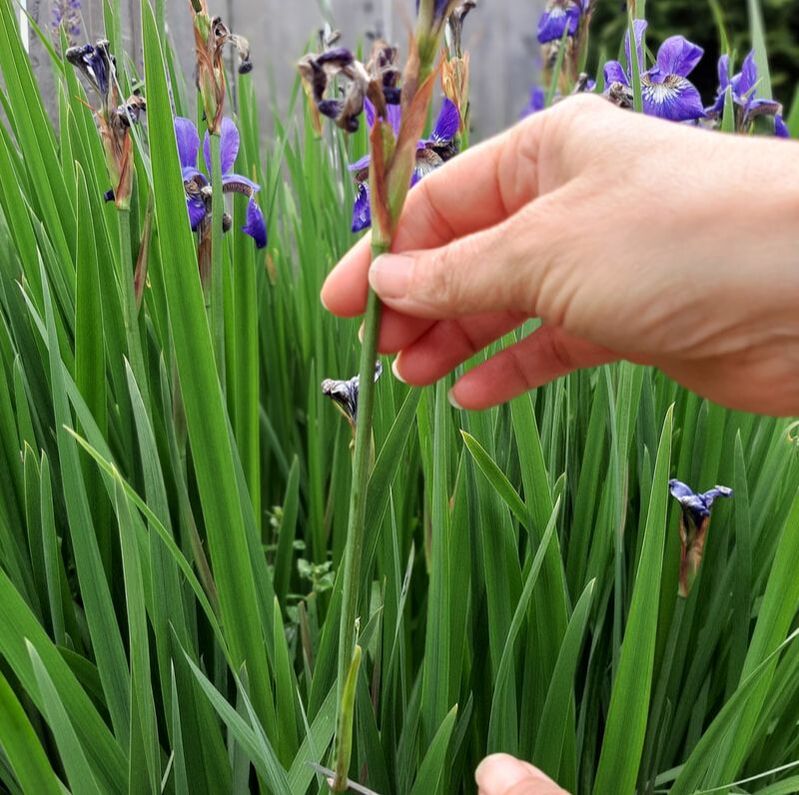
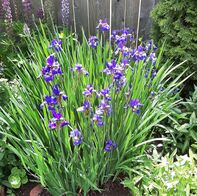
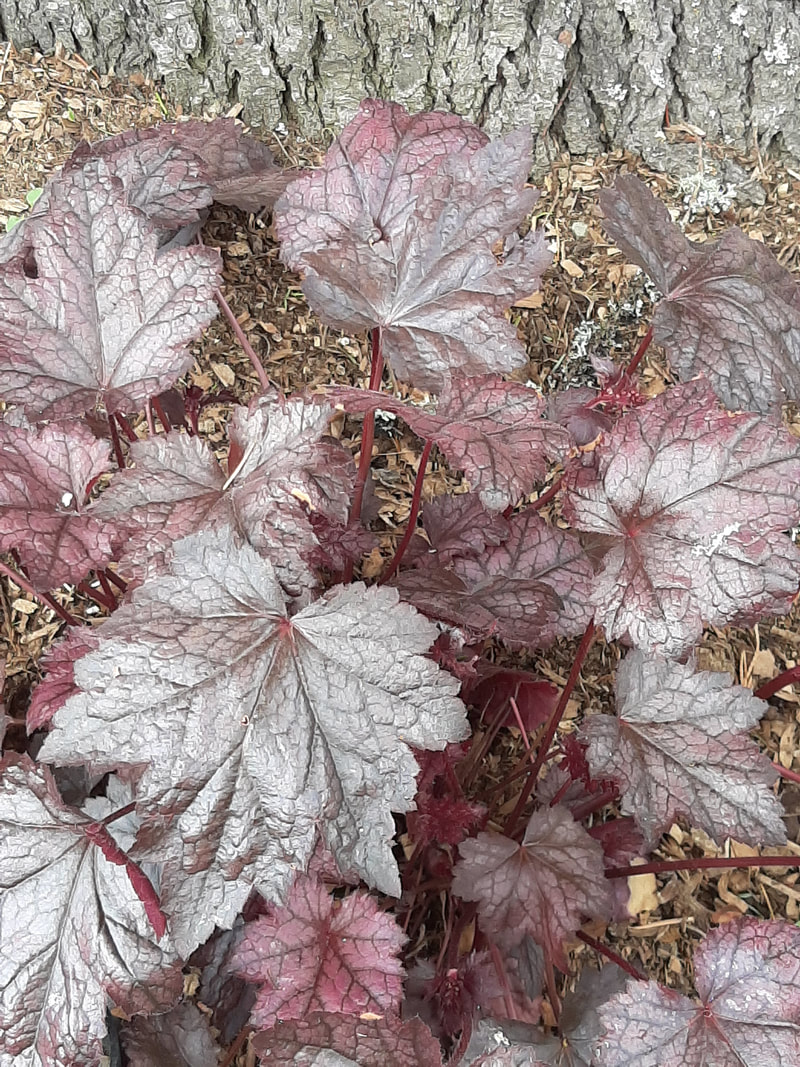
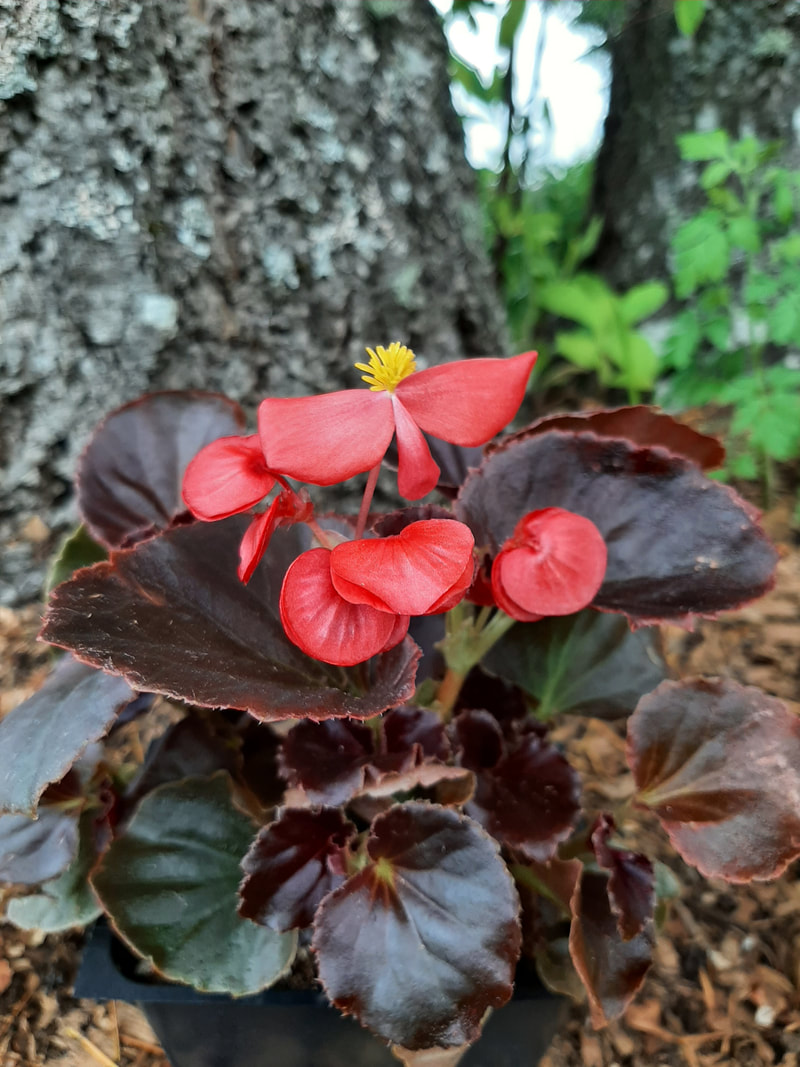
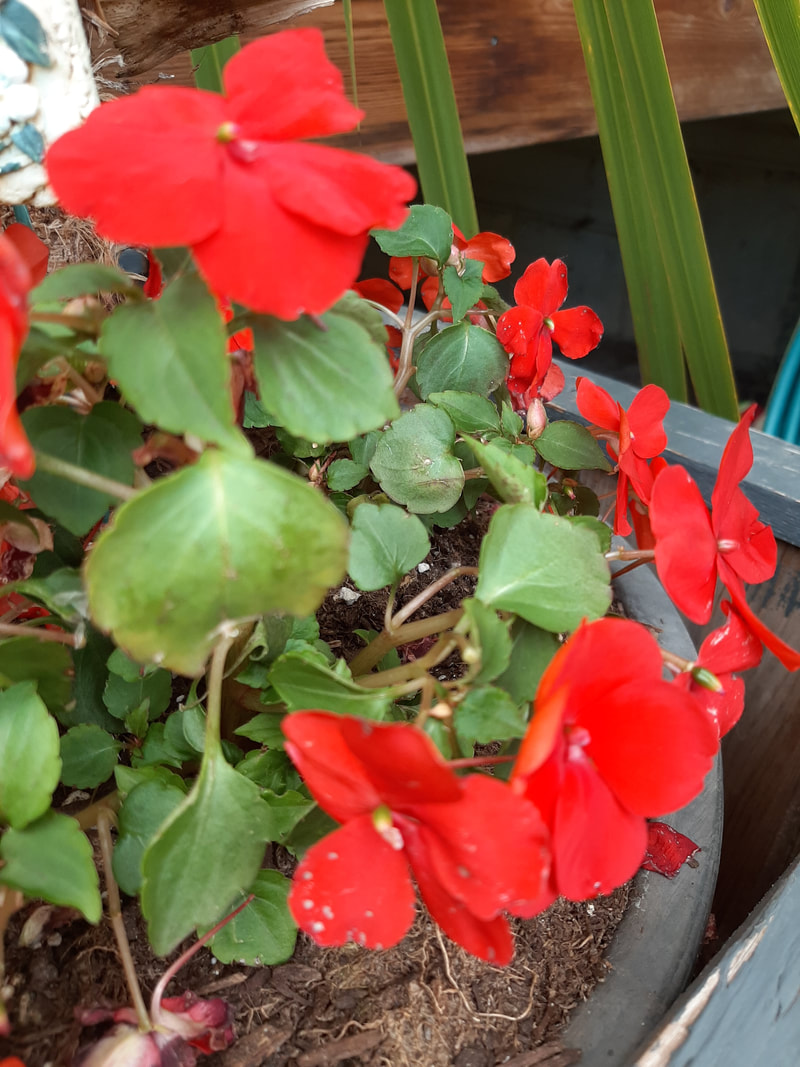
There are some perennial flowers that have spike-like blossoms and bloom from the bottom to the top. These are deadheaded after 70% of the flower has finished blooming. Some examples of these are: *Delphiniums *Foxgloves *Hollyhocks *Lupins Other perennials flowers look better if you remove their flowers once they are done, but won’t provide new flowers until the next season. These can be taken down to the plant for a cleaner look. It will help them to focus their energy on root growth and healthy leaves instead of seed production Here are a few examples: *Daylily *Bearded Iris *Coral Bell *Hosta *Flowering Bulbs *Peony *Lamb’s Ear *Rose Mallow *Hellebores  Aliums flowers look nice even after they bloom, no need to deadhead. Aliums flowers look nice even after they bloom, no need to deadhead. There are some flowers that do not require deadheading at all, for example flowering vines, impatiens, and begonias. Some have pretty seed pods and you may wish to forgo deadheading. For those that don’t provide a second or any further show until next year than it is really up to you. Take your cue from nature and yourself, if the plant looks like it has finished flowering and you prefer a neater appearance than remove the flower.
If you do deadhead your flowers stop once the weather turns chilly. The birds and wildlife will thank you for providing another source of food during the cold months. Allowing the seedpods to form is a way to give back to nature. Finally, if deadheading seems a little daunting, break your yard up into sections and do a little at a time. I break my yard into 4 sections that I go through on a weekly basis. This keeps the job to manageable bites that require 15-20 minutes of my time. If you get super busy over the summer or go out of town for a few weeks, vacation, don’t worry if you fail to deadhead your garden. The practice is more to extend the flower show and to keep it looking fresh. The plants’ health will be fine. Enjoy, and happy gardening!  Polyculture in its simplest term is growing many plants together. It uses the philosophy of both intercropping and companion planting. Intercropping is usually the use of a fast-growing crop between a slower growing crop to make the most of your garden space. Companion planting uses different plants that enhance each other's growth and provide pest protection. By using polyculture principles you are helping to create healthy soil. The benefits of polyculture within your garden.
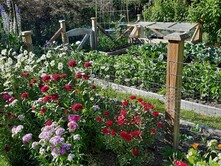 To help me with combining plants I consider the following: 1. One of the simplest ways to reduce disease and pests is crop rotation. I use a 4 bed crop rotation. If you have one bed, think of it in 4 sections. I then rotate my crops Bed 1 Tomatoes, peppers, potatoes, Bed 2 corn, celery, broccoli, cauliflower, cabbage Bed 3 roots onions, carrots, beets and Bed 4 onions, peas, beans, cucumber. Although, I do mix it up a bit, as you will see below. However, this is my starting point. 2. I consider which plants are best planted together as companions. There are many charts and they can vary, but they are a good start. https://www.westcoastseeds.com/blogs/garden-wisdom/companion-planting 3. As I consider where to plant my crops I allow some plants to self-sow from the year before, usually there might be bok choy, kale, calendula, chives, lettuce and nasturtiums. Sometimes there can be a random squash, tomato etc. If I am happy where it decides to grow I may leave it. I then consider them in my planting. 4. I then use the square foot gardening principle so that I optimize what I can plant, and it makes it easier for mixing and matching. This is where I will decide where I would like to tuck in a few extra flowers, cosmos or zinnias. I find the calendula and nasturtiums find their own spots, and pull out the ones that are in the way. Example chart https://nourishproject.ca/square-foot-gardening 5. Then I look for gaps to plant beets, radishes, beans and most importantly lettuce. I love to plant lettuce in bare spots to keep a constant supply. 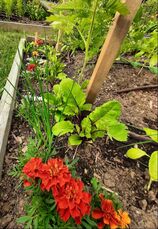 Planting Combinations I think another part of diversifying your planting other than the positive benefits is the fun of experimenting with new combinations. This year planting combinations that I am trying are:
 Feel free to experiment with planting assorted crops in the same bed. Select plants with different growing habits and those that require different nutrient needs. Root crops with shallow rooted crops. Also, avoid planting heavy feeder crops together such as corn and tomatoes. Above all have fun, after all a garden not only provides nutritious food it can be a mood booster as well.
 Interested in shade plants. Looking to brighten up a shady corner or create a border that will brighten a forest or tree line. I have a few suggestions that have worked well for me under large trees and areas that receive very little or no direct sunlight. First, you should understand that there are different variations of shade:
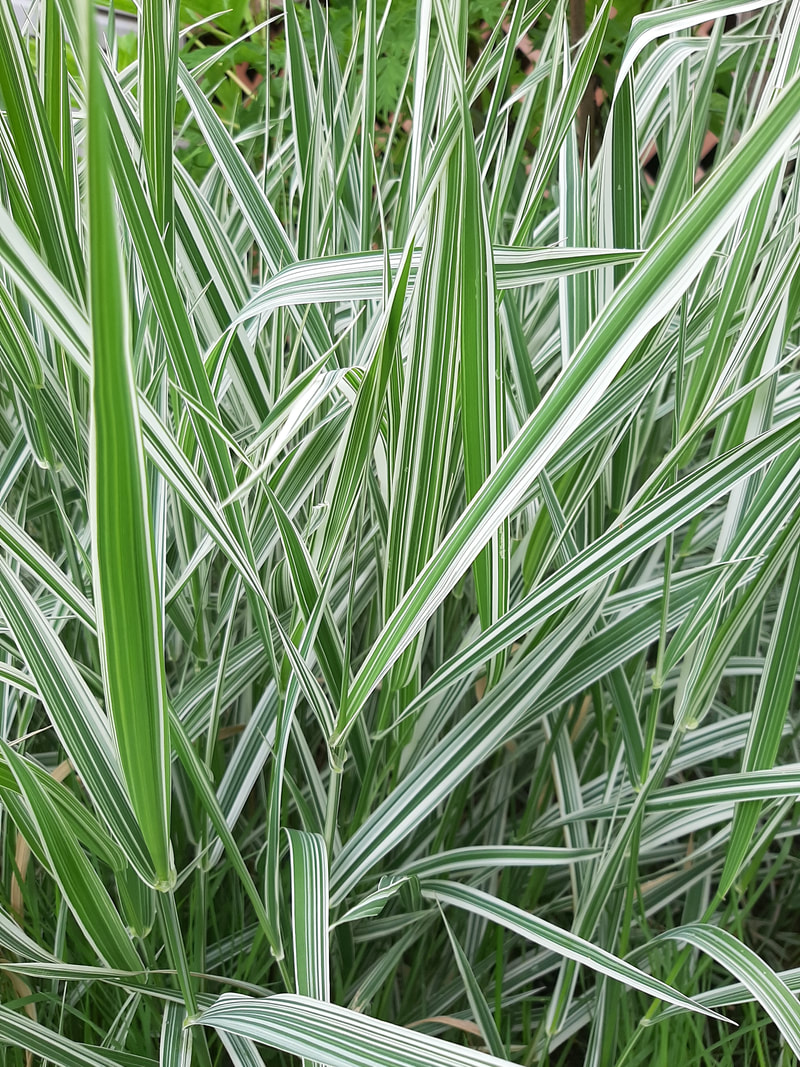
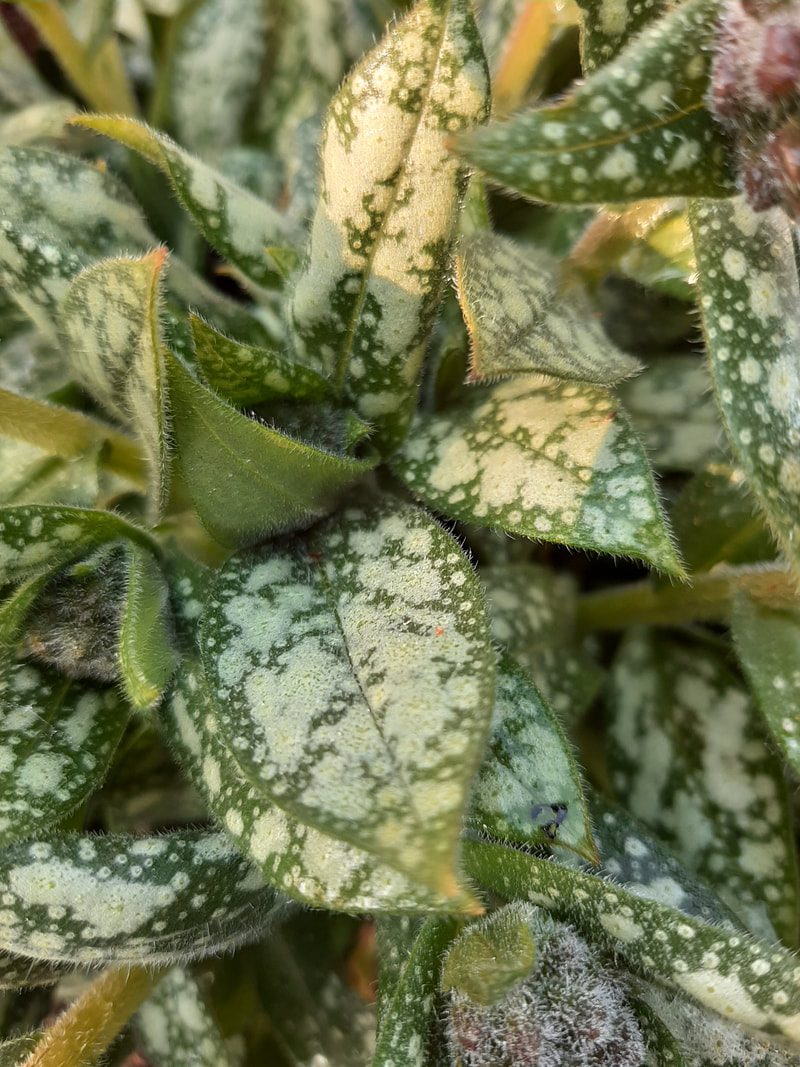
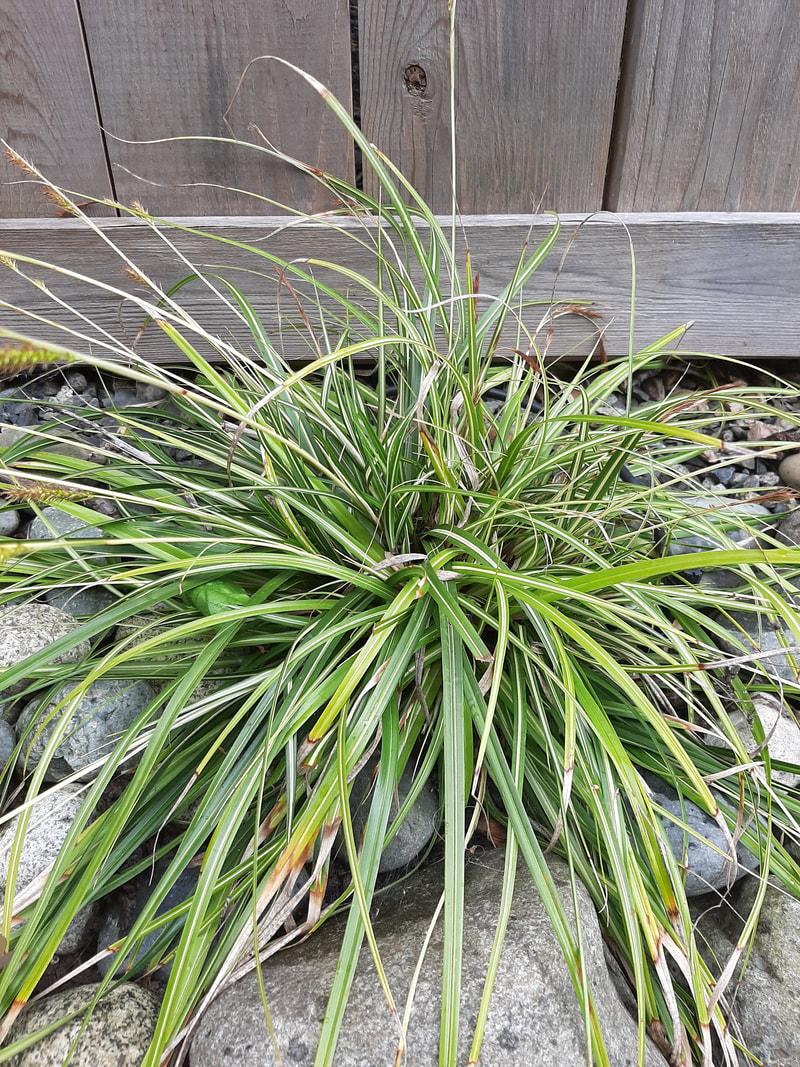
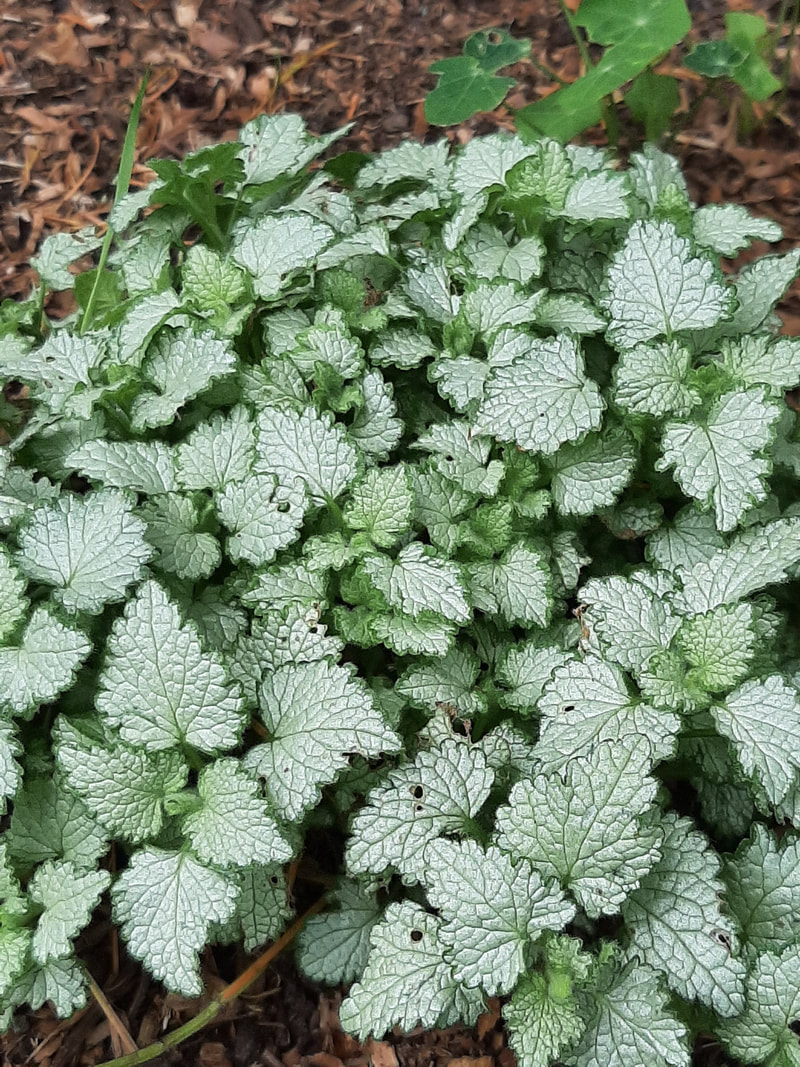
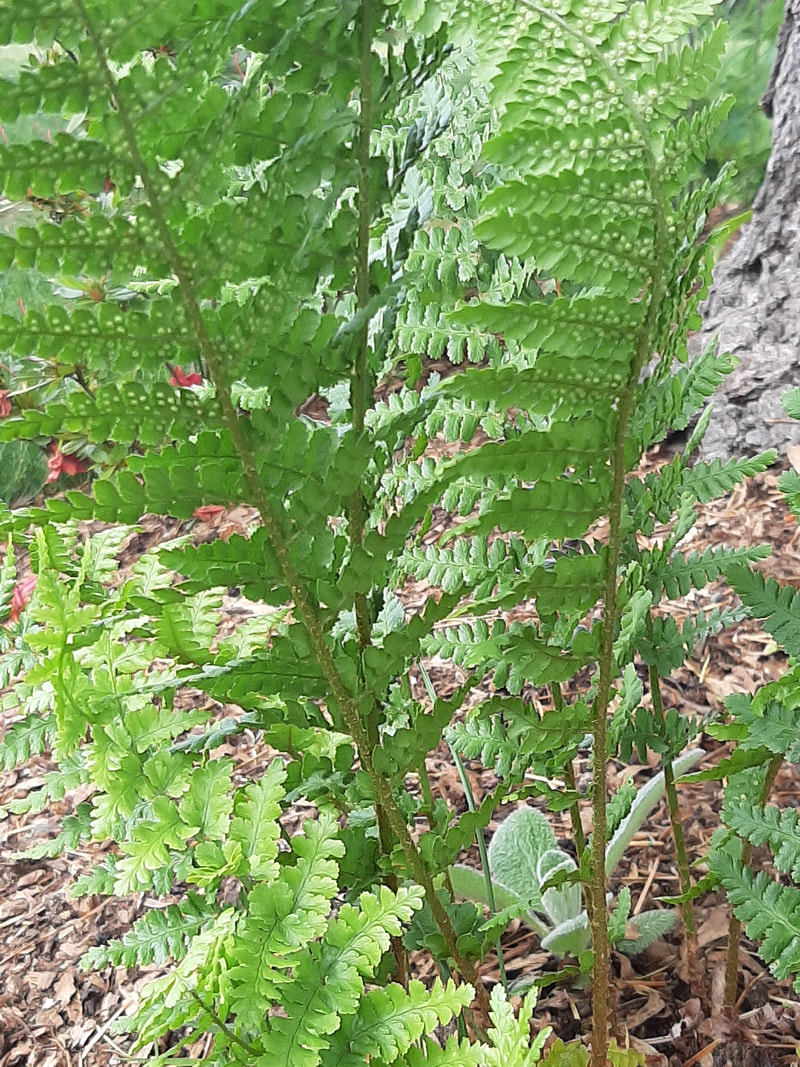
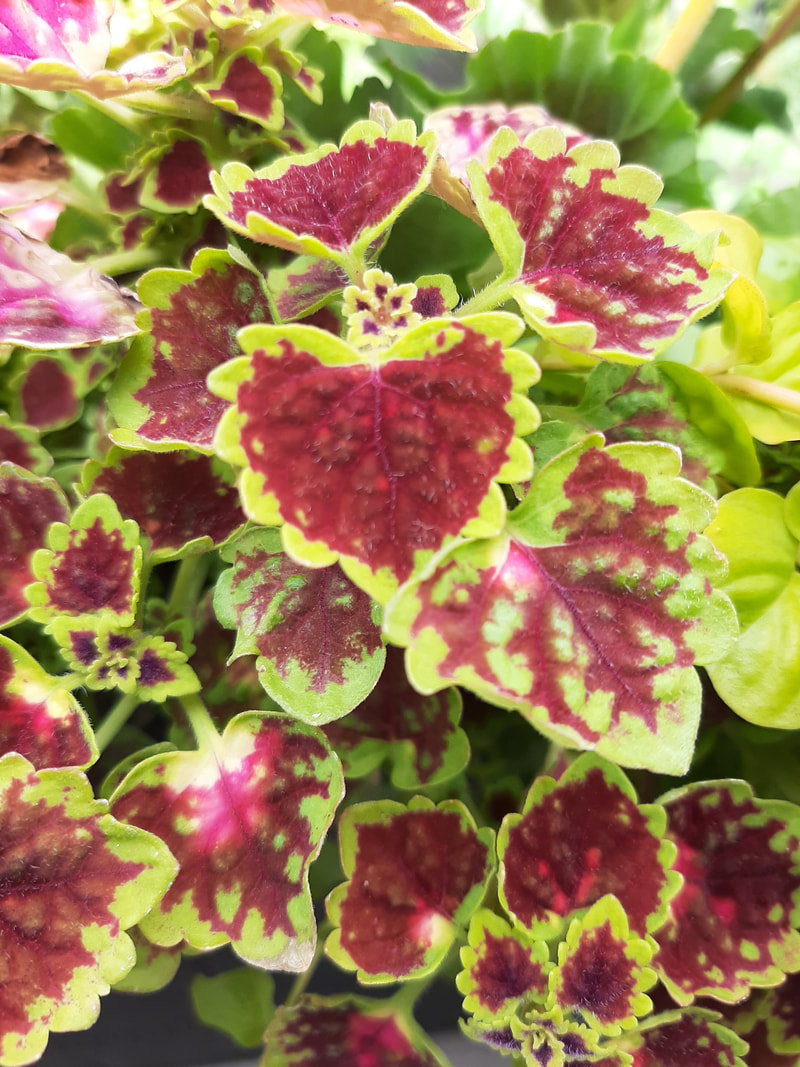
Background Structure Second, use different shades of green for background structure and texture, then add plants that provide color that will work well against the rich greens. Colors that really stand out are white, cream, yellow, pale pink, light purples. I like the richness of reds and will use them in my landscape, but white has far more of a contrast than the red. Another way you can break up the greens is using variegated plants. Create Levels Midground Third, create levels by having a large anchor plant that likes shade such as a Japanese maple, certain hydrangeas, rhododendron or peony tree. Even on a forest edge or tree line this can add color to your backdrop. Foxgloves can also add color and interest with their tall, slim stems and tubular blooms. Foreground For the next level down here are a few suggestions that you can use in groupings of at least 3-5. These include: ferns, hostas,azaleas, bleeding hearts, spiderwort, foam flower, astilbe, daylilies (depending on how much shade they may flower less or not at all), yarrow, woodland phlox, columbine or boxwoods. Also, there are a few grasses that grow well in shade: Hakone grass, ribbon grass and emerald sege. Early Spring color Daffodils and hellebores. Ground Level For filler color and texture you can add extra color with low growing annuals and perennials. Perennials Coleus,caladium, coral bells,lungwort, bergenia, wild ginger, deadnettle, bluebells and anemones. Annuals Begonias, hardy geraniums, pansies, violets, impatiens, alyssum (purple grows best), lobelia, calendula and torenia. Early Spring color primrose, crocus, snowdrops.
Tips
Shade areas don’t need to be boring. Choose the correct plants for shade, add some color, create layers and repeat shade plants for unity. Happy gardening!  Did you know that the National Garden Bureau flower for 2021 is the Sunflower. Chosen I am sure for its beauty and uses. There are so many varieties and sizes that allows anyone to grow sunflowers. I have planted “ Ray of Sunshine” from my previous year's seeds. These are large single head sunflowers that grow 6 feet (180cm) tall. I have had them grow even taller up to 10 feet ( 300cm). I am experimenting on growing my sunflowers as a companion plant with cucumbers. The sunflower and cucumbers are said to be great companion plants. The sunflower's thick stalks will serve as support for the cucumbers. While the cucumber’s leaves can provide shade for the soil, reducing weeds and keeping the area moist. I have also done the same with the pole beans, which have mixed information as to whether they are good companion plants for one another. I will follow up with a post on how each grows together. Thoughts on Companion Planting Companion planting has become more and more a part of my garden planning. Not only does it allow me to plant more in an area, but if done right the plants can mutually benefit one another. That said. There is so much trending about companion planting without the science behind it. Therefore, I would use the information on the internet as guidelines and not hard and fast rules. The main thing to understand is that plants have different requirements. Certain plants grow rapidly and can crowd out others, taking more than their share of water, sun and nutrients. Other plants add nutrients to the soil, draw beneficial insects or give of scents such as flowers, and herbs that confuse insects from their host plants.The most important thing for successful plant growing is to provide the basics: good soil, adequate light, water, air, and root space. What we often think is a companion planting conflict is more likely just competition for resources. Sunflowers and Companion Planting So it is not surprising that there is mixed information on whether sunflowers are good companion plants. It seems Sunflowers can be allelopathic, which means they exude toxins that stop nearby plants from growing. They also are known to help heal the land by pulling harmful chemicals out of the ground and storing them. The term for this is phytoremediation. Here is an example where the sunflowers were used to improve the soil. https://www.farmersalmanac.com/sunflowers-to-the-rescue-15614 If this is the case I would suggest not eating the seeds and composting by some other means than your home compost pile. Whatever the information out there, focus on good plant spacing and providing suitable growing conditions. Every plant needs adequate root space to grow, and sunflowers are big resource hogs. If we focus on providing each plant with the required conditions, the rest sorts itself out. 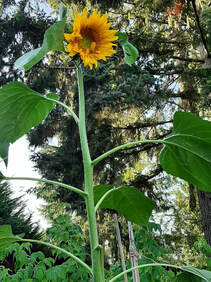 How to Grow Sunflowers
Planting: There are so many varieties of sunflowers that you need to follow the instructions on the seed packets. Usually, the size of the seed determines the seed depth. The variety I have recommends 1/2” (13mm) deep and 4”(10cm) apart., then thinning to 12”(30cm). The “Mammoth” variety would recommend planting seeds 1”(26mm) deep and 6”(15cm) apart, then thinning to 36”(90cm). Direct sowing is best for less root disruption. Make sure to plant twice as many as needed. If wanting to start indoors use containers that will decompose in the soil. Sunflowers dislike having their roots disturbed. I prefer to do it this way, since I get to place my plants exactly where I want them and only plant the strongest ones. Timing: Sunflowers need warmth to germinate so direct sow a week after the final spring frost. Ideally, the soil should have a temperature between 60-70F ( 15-21C). The warmer the soil the sooner they will germinate. They can take 7-21 days. Soil: Choose a site in full sun, with average fertility and good drainage. Sunflowers are not very sensitive to soil ph and can grow in soil with 5.7-8 ph. They are heavy feeders and benefit from a good addition of compost. Harvest: The seeds should be ready to harvest by late summer to fall, depending on when they were planted. Allow the seed heads to dry on the stems if possible. You can check them when the petals become dry and start to fall off. The seeds are just under the yellow coating and can be removed by rubbing and pushing against them. Sunflowers are a great addition for your garden with their bright colors and various sizes. They do require lots of sun so they must be planted in a sunny location that gets at least 6-8 hours of sun. They are fun to watch grow and children love them. They are a unique, bright, happy flower. No wonders they have been chosen as NGB’s flower of 2021. Happy gardening! 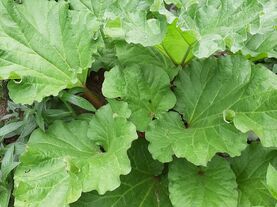 I enjoy growing rhubarb not just for its stalks, but more than that, I love the way it looks in my perennial garden. With its large foliage it adds a wonderful visual texture to the garden. We think of rhubarb as a fruit but it is actually a vegetable since we eat its stems, but makes a great fruit substitute, especially since it is available so early in the year. Rhubarb likes a cold climate, because it requires a dormant period and therefore will not thrive in a hot climate. What ends up happening is the stalks that are red and edible become green and inedible. It likes quite acidic soil, but will grow in any well-drained soil. It seems to thrive in that forgotten corner of many old style gardens. Planting If you wish for rhubarb to grow for many years, try to plant in an area devoted to perennials. Make sure that before you plant it that the area receives plenty of manure or well rotted compost. Dig a deep pit, get rid of the topsoil and add the manure and or just well rotted compost. To Divide Or Not The most reliable method of growing rhubarb is from a division taken from mature crowns. You can purchase root cuttings from a commercial seller or quite often you may know someone who is dividing their rhubarb. Most people will divide their rhubarb every 5-7 years. The reason for doing this is to revitalize the plant. The roots can get old and tough and stop producing premium size stalks. However, if you have the room and provide plenty of mulch in the winter you can extend the time considerably. When it dies down, cover a deep mulch of manure, leaf mold and compost. In the spring draw the mulch away from the plant to allow the sun to warm the soil. If you do decide to divide your rhubarb, wait until early spring just as soon as the soil starts to warm up and before new tender shoots start to emerge. Start by digging around the root clump and lifting the whole plant from the ground. Divide the root ball into sections that contain at least 1-3 buds. If the plant is very old the roots will be as dense as wood and may require an axe to divide it. Make sure to plant immediately to ensure healthy transplants. Flowering Variety, maturity, heat or stress can be the cause of your rhubarb wanting to flower. There are heirloom varieties that tend to want to flower more than the modern cultivated varieties. The older the rhubarb is the more it will want to go to seed. This may be a time to divide your plant. Since rhubarb is a cool season crop, if the season is unusually warmer than normal it may want to flower. Mulch around the base to keep the roots cooler. Lastly if your plant is not receiving enough water, is lacking in nutrients, suffering from animal or pest damage it will cause the plant to feel threatened and start to flower. Water regularly and extra during heat spells, compost regularly, and watch for pests and disease so that you are able to deal with it quickly. Flowering rhubarb will not produce succulent juicy stems. All the energy goes into the flowering of the plant diverting all the nourishment into the flower not the stems. Therefore, as soon as they emerge, cut them off. This will allow you to continue to enjoy the stems for the rest of the season. 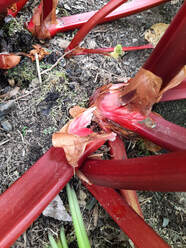 Harvesting
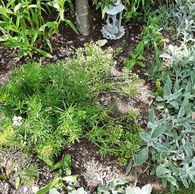
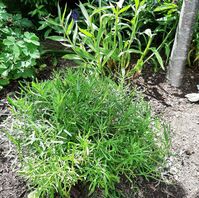
Spare the plant the first year to allow the energy to go into the plant roots. After the first year only harvest the thicker stalks and allow the thinner ones to nourish the plant. Ideally, you should wait until the third year to harvest. In the third year you shouldn’t harvest more than a third of the plant. After that, never harvest more than half the plant in one year. You know the stems are ready to harvest when the leaves are fully open and the stocks are over 7”(18cm) long. I like them to be around 12”(30cm). To break off a stem pull it back away from the plant and twist downward. You can cut the stems, but the plant takes longer to bounce back, twisting down to remove allows the plant to recover a little more quickly. Remembering Rhubarb I grew up with my Mom, excitedly stewing up her harvest of rhubarb. I can still smell the scent it left in the kitchen. She would then serve the boiled zinginess with custard. The two flavours blend perfectly together, leaving a unique taste with every mouthful. Others may have memories of delicious strawberry-rhubarb pies, tarts or crumble. How about strawberry-rhubarb jam, or a new twist blueberry and rhubarb. Whatever your memories, rhubarb has been primarily thought of as a dessert. One that often brings back happy memories of spring and old fashioned goodness! Rhubarb not only provides you with an early crop, it also looks attractive in a perennial garden. This low maintenance vegetable given plenty of organic matter and proper harvesting should provide years of enjoyment, and happy memories. Happy gardening! 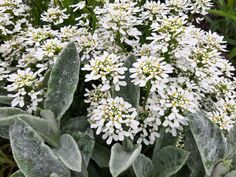 CandyTuft, also known as Iberis is a low growing flowering perennial that grows best in zones 3-9. They can tolerate some shade, but prefer full sun to create a large display of show stopping flowers. This makes candytuft an excellent early spring flowering plant. Requiring little maintenance and easy care it makes a great addition to your spring garden. 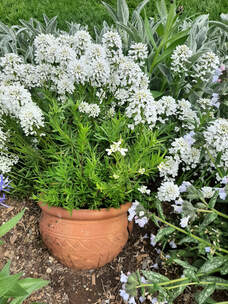 I had found a broken clay pot in my yard that was left by the previous owners. It had such a pretty design that I didn’t want to throw it away so I placed it in my garden with the idea of planting something that would spill out of it. The problem was that it was too dry of an area for most plants until I planted candytuft. It has filled in nicely and looks great against other plants.
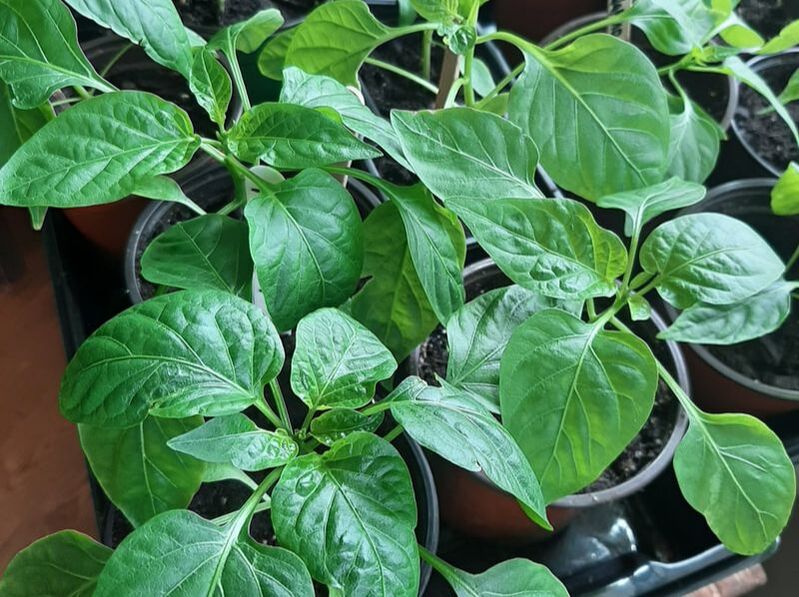
Candytuft did not get its name because it looks like cotton candy, although it does have a beautiful display of dense, delicate jewel-like white flowers. It got its name from where it originates from Candia (Heraklion) the capital of the Greek island Crete. In its natural climate, candytuft is found in rocky, sandy regions, which is why it grew so well in my broken clay pot. The roots do not like being wet, so it is important to not overwater them! Candytuft does not respond well to transplanting or being moved so direct sowing is probably the simplest. If starting indoors use peat or coir pots. Transplant out after last frost 6-12”(15-20cm) apart. I chose to direct-sow my seeds. The seeds were planted barely below the soil surface. I watered often keeping the soil moist so that they would germinate. Don’t start until the soil reaches 70F(21C). The cooler the soil, the longer it will take to germinate. The seeds can take between 10 days to 3 weeks. Once the plants are established, you can divide them in either spring or fall. I just use a shovel to separate the clumps but you can dig the entire plant and cut it into several divisions. As long as each division has both roots and foliage, they will become new plants. Candytuft does self-seed, but it never gets out of control. Once the blooms of the candytuft are spent, you can cut the old growth almost down to the ground. This will prevent the plant from getting too woody and spindly. The new growth can be cut a third back or just a little to keep it neat and compact. This will not only keep your plant nicely shaped, but will give you a second bloom. With its low growing height, candytuft is the perfect height to cover declining foliage and tall, bloomless stem flowers such as zinnia, cosmos and others. It looks lovely spilling over a wall, at the front of a bed, or draping out of a pot or basket. This excellent early spring evergreen perennial may be exactly what you are looking for. It is a trouble free, low maintenance perennial, with a display of jewel-like flowers that requires little water, and can fill those sunny hard to plant locations. It is deer and rabbit resistant, but attracts bees and butterflies that are beneficial to the plants nearby. You can divide it or allow it to slowly spread, providing a great backdrop for rocks, and other plants. Happy gardening! 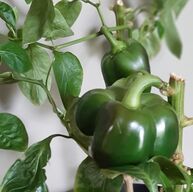 It is a month before my peppers are ready to be transplanted outside. In a previous post I discussed the option of overwintering peppers inside to give them a head start for the season. I kept a few and will transplant them outside when my new plants are ready. These peppers are eager to grow now that the daylight has increased. They have been flowering, although I probably should have removed the flowers and allowed the energy to go straight into the plant itself. However, my grandson has enjoyed watching the growth and learning more about the peppers. I will remove everything before I start to harden off my peppers. Peppers are self-pollinating meaning they don’t need the assistance of bees, other insects or wind for pollinating and producing fruit. The pollen simply drops from the stamen to the ovary on the same flower or on other nearby flowers. Although, more fruit will be produced if the wind blows or the plant is shaken slightly. Other self-pollinating vegetables include tomatoes, eggplant, green beans, sweet peas and peanuts.
I love to make green chili sauce and will add fresh peppers to just about anything, therefore I am growing a mix of hot peppers and california wonder bell peppers. The process of starting peppers from seed is fairly simple, but peppers can take a bit to germinate and grow so here are a couple of things that have helped me.
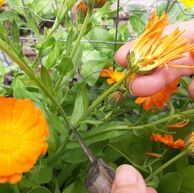
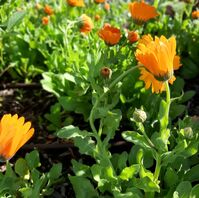
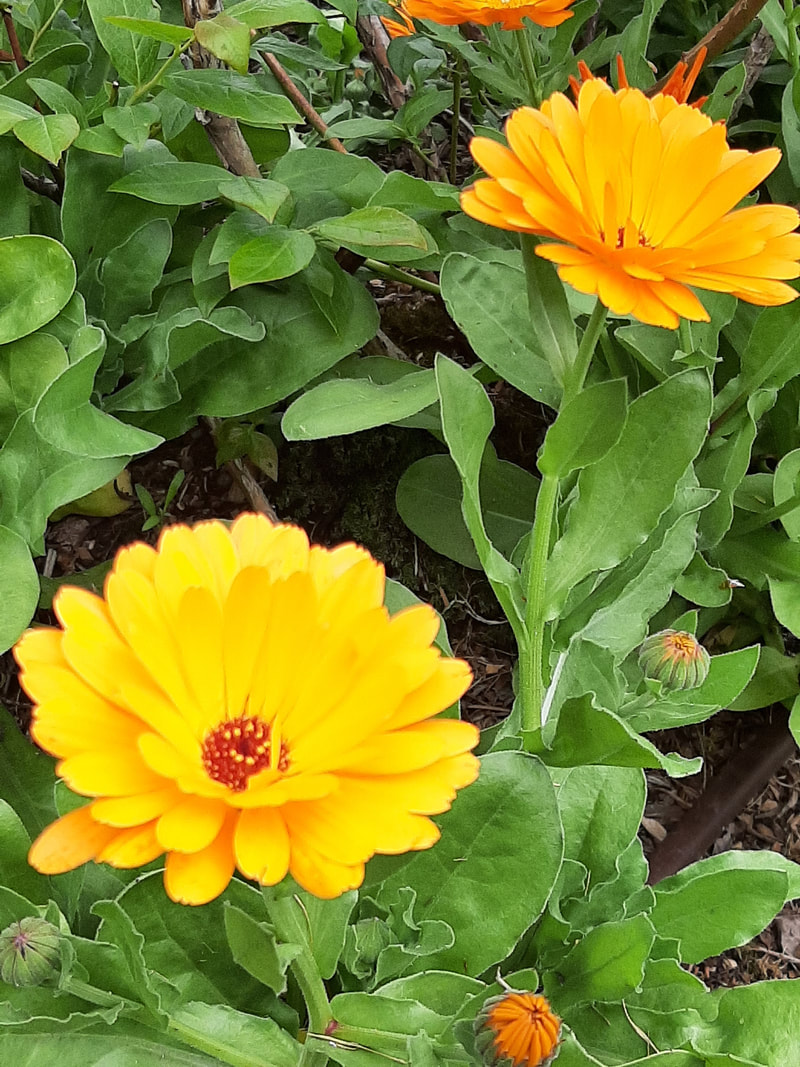
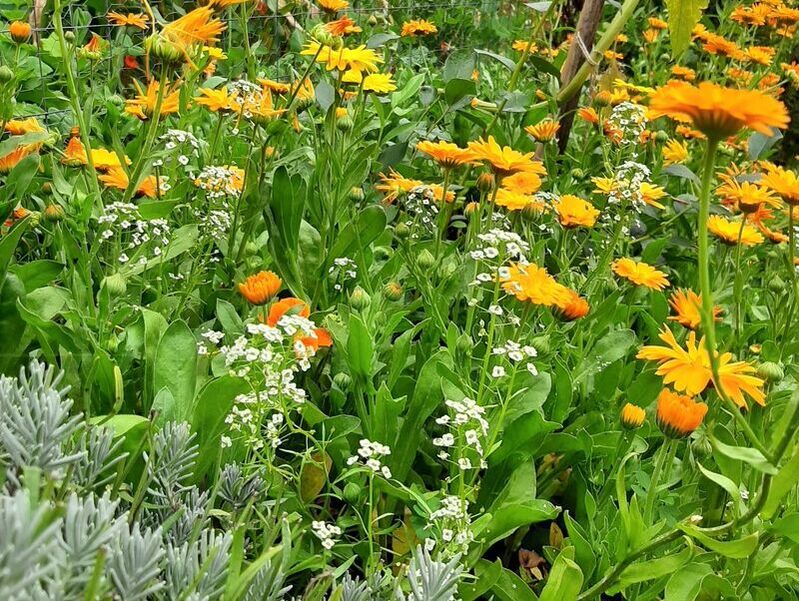 There are a few flowers that can benefit your garden, but the following 5 flowers calendula, cosmos, marigold, nasturtiums and zinnias are some of the easiest to start from seed and to also collect their seeds. These flowers help to support the soil, deter pests, attract pollinators and good bugs, and add beauty to any vegetable garden. They are some of the easiest flowers to grow that also pack a punch in the garden.  Calendula This flower works well as a trap crop and for attracting pollinators to the garden. With its thick roots it also can act as a living mulch when planted in groups, protecting the soil from the sun and retaining moisture for your vegetable garden. Deadhead in order to keep it blooming from spring until late fall. Leave the roots in the ground to provide the soil further benefits. Calendula is known to attract slugs, so position a small distance from plants such as lettuce to keep the slugs munching on them rather than your vegetable. Calendula attracts ladybugs, lacewings and hoverflies which prey on the aphids and whiteflies that can cause harm to your plants.  Cosmos These flowers are a beautiful addition to your garden and do a great job attracting pollinators. Plant them near but not with aphid prone plants to deter aphids from your vegetables and fruit. 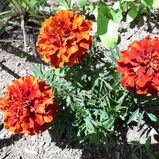 Marigold These bright flowers are similar to the Calendula (pot marigold), in being a great trap crop for attracting pollinators and beneficial insects to the garden. In large quantities the classic French marigolds produces a chemical that can work as an organic pesticide that helps in controlling root knot nematodes that feed on the roots of vegetables, in particular tomatoes. Mexican marigolds produce a stronger version of this chemical which has the potential to inhibit the growth of some of the more tender herbs and vegetables such as beans and cabbage. At the end of the season you can cut the plant, but leave the roots in place for a continued deterrent against root knot nematodes. Food for thought, check out these links. https://www.facebook.com/groups/GardenFundamentals/ https://www.seattletimes.com/life/lifestyle/do-marigolds-keep-pests-away-or-are-they-just-pretty/ 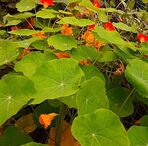 Nasturtiums These pretty flowers are not only edible and pretty to look at, but are another useful flower to plant near aphid prone vegetables. They attract hoverflies, which kill and eat aphids. Plant nasturtiums close to broccoli, cabbage, brussel sprouts, beets, pumpkins and zucchini.  Zinnias These bright flowers attract many pollinators such as bees ,but particularly hummingbirds. Hummingbirds eat whiteflies, which like to feast on tomatoes, cucumber and potatoes. Zinnias also attract beneficial bugs such as ladybugs and wasps, which are known to control unwanted pests like cabbage flies, aphids and caterpillars. When planting your vegetable garden don’t forget to add in a few flowers making your garden not only functional but also lovely to look at. Happy gardening! 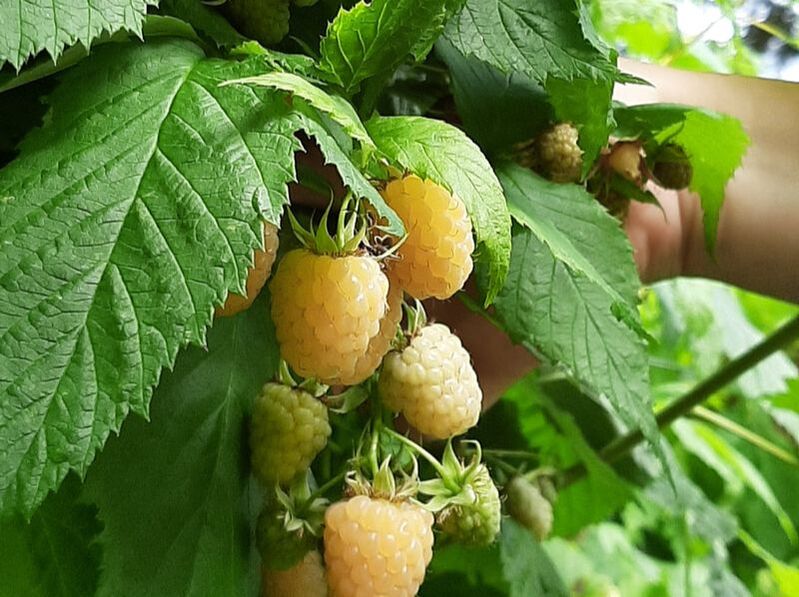 Who doesn’t love raspberries! Juicy, lucious often red berries that grow in abundance with a delicious sweetness to them that can lend to being tart when underripe. Raspberries are often red but can come in a variety of colors apricot, amber, purple, black and yellow, which is one of my favorite varieties. Great to eat fresh, or frozen in smoothies, baking or jam. Once established you can have a crop going from June until October. Raspberries are a wonderful perennial that will continue to give you fruit for years, as long as you do a few simple things. 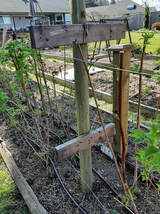 Barrier Create a barrier, I cannot stress this enough. Raspberries have an extensive underground root system that can sucker new canes some distance from the main plant, before you know it they are growing in your grass, vegetable garden and once they begin they are tough to get out. Ideally, give them an area where you can create barriers on either side or where one side can run freely. I placed a 18” barrier on one side and they easily found a way below it and into my garden beds. 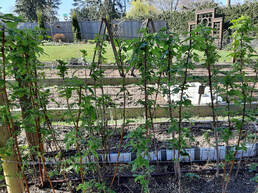 Pruning Pruning not only keeps your plants producing, but by continually thinning out the plants you provide room for the plants to grow so that they aren’t looking to grow elsewhere. Raspberries do not like to be overcrowded and can be susceptible to disease, death and poor fruiting if not periodically thinned out. To keep raspberries under control and easy to pick the rows should not be any wider than 2 feet. One of the most confusing things for me when I first started growing raspberries was whether to prune my raspberries to the ground or just top them to around 4-5 feet. You can’t go wrong by just topping them to 4-5 feet. However, the general rule is that if they are summer bearing then top them, if winter bearing you can top them or cut them close to the ground. Winter bearing raspberries when cut close to the ground will not produce a summer crop, but will successfully produce more fruit later in the season. 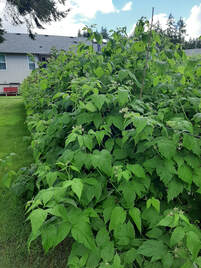 Compost
Raspberries adapt to a wide range of soil types. They grow best in a sunny location with well-drained, fertile soils with a pH of 6.0 to 6.8. It is best to prepare the soil in the fall giving the soil a chance to mellow. Raspberries grow poorly in heavy clay or poorly drained soils. To improve drainage dig in aged manure or compost. You can topdress with leaf mould or homemade compost in autumn and spring to help replenish the soils nutrients. Water Raspberries need to have consistent watering to fruit well. A simple formula is to water enough that the soil is always slightly moist to the touch, but not soggy or muddy. To help control disease and minimize water loss water with a drip irrigation system. A successful crop of raspberries can be had by all by following a few steps. Make sure that your berries get plenty of sun, water, nutrients, and regular pruning. Above all, remember to keep them confined by providing what they need to keep them happy, and creating a barrier to prevent underground sprawling. Happy gardening! |