 Designing a micro irrigation system begins by gathering information, which includes water pressure and flow rate, water source, point of connection, and finally a sketch of the area.
Flow Rate can be determined by doing a bucket test with the following formula. Flow rate in GPH = Bucket size / seconds to fill x 60= gpm x 60 x 0.8 pressure loss = GPH eg 5 gal bucket/ 50 sec x 60 = 6gpm x 60 = 360gph x 0.8 = 288GPH 18.925 litre bucket/ 50 sec x 60= 22.71 litres per minute x 60=1326 Lph x 0.8 pressure loss=1090Lph The flow rate will then determine how many micro sprays, emitters or the length of drip line you can run on each section or zone. In our example we have determined a flow of 288gph(1090Lph). Determine your pressure by attaching a pressure gauge to your outlet. Purchase an inexpensive one at any hardware store. Attach it to your outside tap, turn it on and read the psi off the gauge. You may require an adapter to convert to the source you are using. Knowing your pressure is important because drip systems require a lower pressure than standard irrigation systems. If you have over 50psi I would recommend you put a 30psi pressure reducer. If pressure is 90psi or more you may need a household pressure reducer. 1. Creating a sketch of the area that needs watering. Important information to include are flower beds, vegetable beds, the plant types including trees, shrubs, ground cover and any containers. Then you need to note the water source and then note all walkways, paths, buildings, compost areas or any object you need to get around. Once you have a design of the area you then can decide what works best for each area that needs watering. Consider the watering needs of the plants: are they in shade or full or part sun, do they need more or less watering, and soil type. For instance pots should be separate from other planting since they usually need daily watering. Flower beds need different watering than fruit trees or vegetable beds. (see emitters) 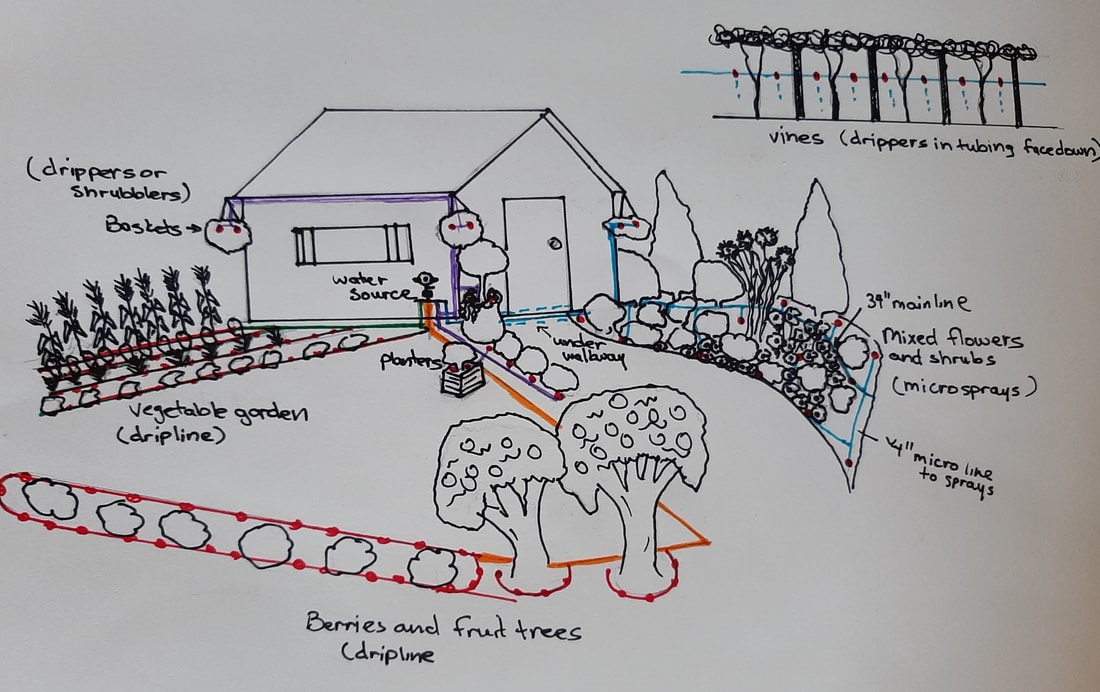 2.Choosing which micro product After grouping similar plantings as much as possible then you determine what kind of micro component you wish to use. Some of the options are as previously discussed dripline and tape, emitters, shrubblers and micro sprays. 3. Designing your micro system Now that you have gathered all your information and chosen the products that fit your needs, you can now design your system. When planning your drip system, it is important not to exceed your water source capacity. To determine your flow zone capacity. Calculate like areas, and add up the total number of emitters, dripline, micro sprays, shrubblers, etc. and their flows.
3. Dripline- you need to decide what size and what it comes in. If ½” it comes in 100 and 500 ft coils, ⅜ comes in 200ft coils. In our example you would need 2 x 200 ft. of ⅜. You will also require u-stakes for keeping the drip line in place every 3-5ft 4. Emitter or shrubblers for pots and planters. In our example the quantity is 14. 5. Micro sprays for our large bed requires 13. This includes 13 each of couplers, stakes and micro sprays. 6. Determine how many fittings and other connections are needed, this includes any bends, tee connections and plugs for ends. 7. Lastly the water connection supplies. You will need to include the products that connect you to your source and prevent damage to your system, such as a filter and pressure reducer. There are many variations of connecting to the water supply, but 90% were one of the two following: 1.Off the side of the house connection from the house tap (hose bib). This is the simplest way to connect and therefore, the most popular for homeowners that want to put a simple micro system in their yard to water their plants.
1. Compression fitting to connect to the main water line. 2. Ball valve with a drain. 3. backflow preventer 4. hose bib for blowing system and draining 5. Municipal poly or sched 40 pvc pipe for main line to group of valves 6. Manifold fittings 7. Valves 8. Fitting to pipe for each section. 4. Installation tips
0 Comments
 If you are looking for something that gives you a little more than a single drip, Shrubblers with their 8 drip streams may be more suitable. They are a low flow stream spray 2-20gph that can be adjusted from a slow drip to a 24” stream spray. Shrubblers are not as well known as emitters, but they are one of the most popular items sold due to their versatility. Gentle on plants and soil, they are another great option for your trees, shrubs, pots and planters. They come in a 360 or 180 degree flow. You can purchase them as a full unit complete with a 5” stake and ¼” coupler attached, ¼ barbed for placing directly onto pipe or 10/32 thread for risers if height is needed. By rotating the cap you can control the flow or even shut-off a shrubbler. This makes it easy to adjust the water needs of different sizes and types of plants. Shrubblers come apart making them easy to clean, and with larger openings require minimum filtration. 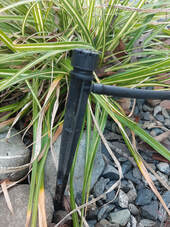 SHRUBBLER ON STAKE SHRUBBLER ON STAKE Highlights:
On a personal note, I have found shrubblers to be very useful. I have used them for short rows of trees, individual fruit trees, and planters. I can change the flow as the trees grow, and with pots I can adjust to size or shut them off completely if not in use. They are easy to install with their built in stake, and I don’t need a lot of extra parts; just my shrubblers and tubing. The only negative I have found with these is if you untwist the cap too much you can lose them. Always make sure the cap is secure after adjusting. Whether you are using drip line, emitters, micro sprays or shrubblers they all do the same thing, which is to provide water at a low and gentle rate. Often it can come down to preference and/or money. I have found using a mix to work well for me. Next week we will look at suggestions for design and installation. 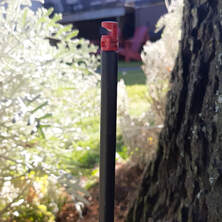 MICRO JET SPRAY MICRO JET SPRAY Micro Sprays operate at a low pressure similar to drip emitters, but are designed for areas where drip irrigation may not work for you. While emitters and drip line water at specific points, micro sprays deliver water through a tiny hole creating a fine, gentle spray at a much lower rate than conventional sprinklers. This lighter application is better for the plants and soaks into the soil more efficiently than your standard overhead sprays. Micro sprays suit areas where overhead watering is required, or it just isn't practical with large or established dense areas. Other reasons to use micro sprays is for irrigating ground covers, large flower beds, or with areas with high water needs. Micro sprays may also be advantageous when water quality is an ongoing concern. Because they have larger openings than drip emitters, micro-sprinklers tend to be less prone to clogging, although their relatively small port size still requires inline screened or cartridge filtration to remove particle sizes of roughly 80 mesh and larger. Since the water is sprayed above ground, a person can more easily detect when there is a problem using visual inspection. Micro sprays are designed to operate between 20-30 psi. You can tell when your pressure is too high when it mists rather than sprays. To solve the problem you can add a pressure reducer to reduce the pressure or a valve to reduce the flow if you plan on adding on to the zone in the future. There are 3 different spray patterns 90, 180 and 360 degrees. For a better 360 pattern, similar to the micro spray there is the adjustable flow spectrum (see picture below). Not only do you get a nicer pattern you can adjust it up to a 6 foot diameter. Micro sprays come in 4 different flow rates and distances that are color coded to help you to differentiate between them. 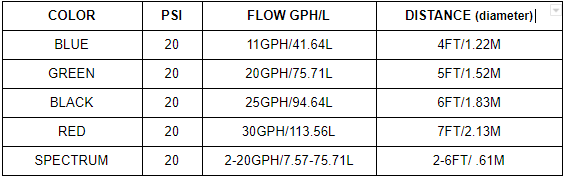 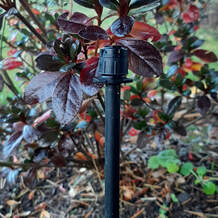 SPECTRUM SPRAY SPECTRUM SPRAY Most sprays distances are rated by their radius, but in micro irrigation distances are based on their diameter. The radius is the measurement of the circle from the center outward. The diameter measures straight across the circle. There are other patterns available in 2 parts with a base and cap. The base gives you the flow rate and the cap determines the pattern. You can find these at stores that specialize in irrigation products.
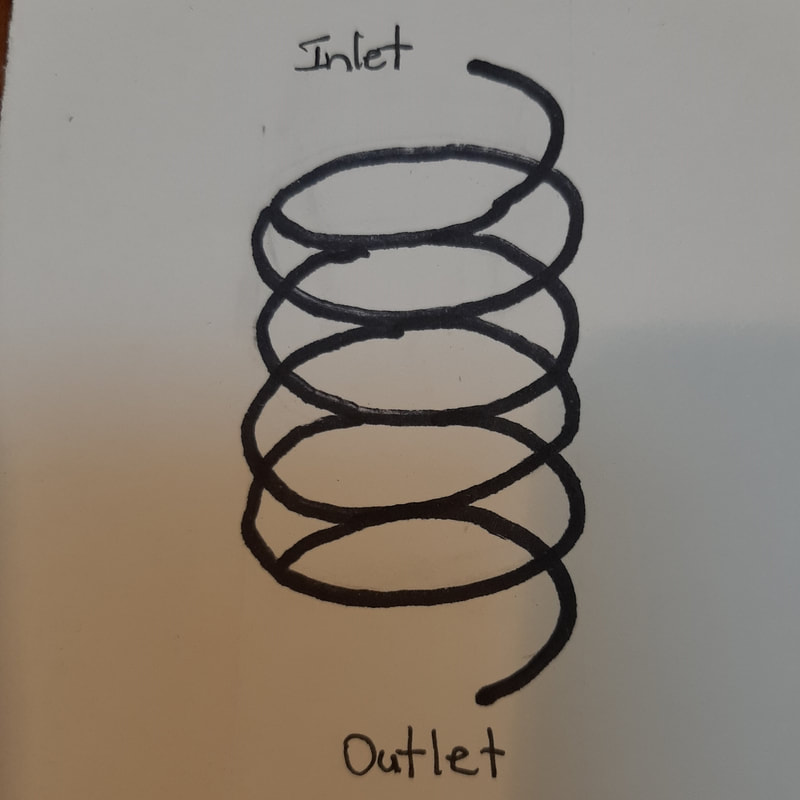
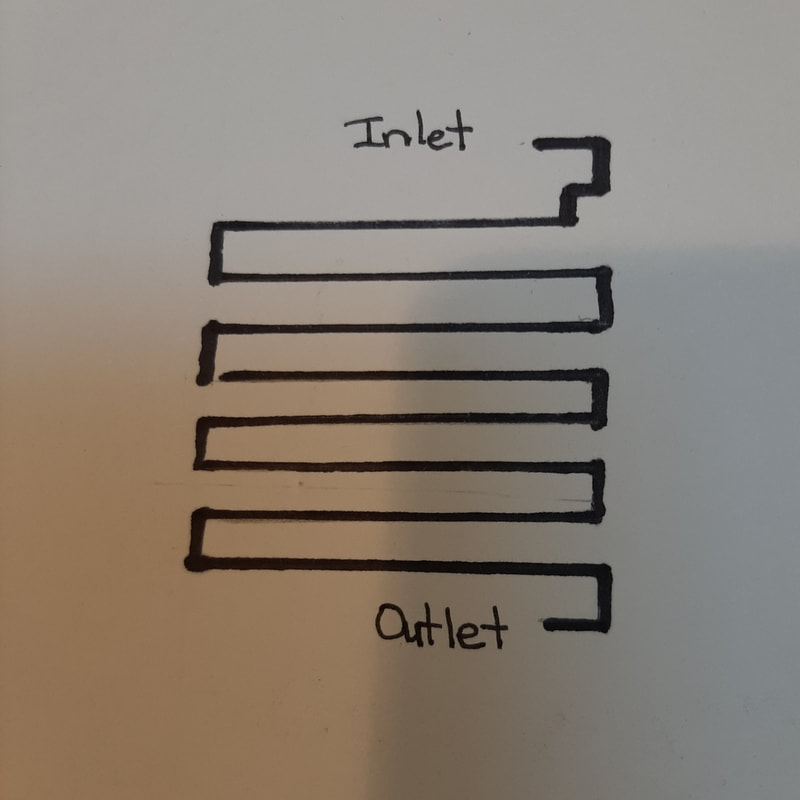
Micro sprays can be installed directly into the pipe, on an extension (rigid riser) that is attached directly to the pipe or the most popular is off the pipe onto a stake that can be positioned where you need it. They are threaded for easy installation and have wide wings for threading and removing. There is also a tool you can purchase that prevents you from puncturing through the pipe, and allows you to punch the correct size of hole for connecting onto the pipe . If the area you wish to water has high traffic by humans or animals you should come off the pipe, rather than attaching the micro riser directly to the pipe. In instances as these you should also use a heavy duty stake holder for the micro spray. Micro sprays have a low precipitation rate and are great for large garden beds, areas with high water demands or heavily cropped areas. If you want to visibly see the water but not damage your plants while still conserving water you may find the answer is micro sprays. Next week we will look at the shrubbler and bubbler type micro products and their uses.  Emitters, also known as drippers, are designed for specific application of water. You can purchase emitters that are either pressure compensating or non-pressure compensating. When you want even distribution of water from one pot to another pressure compensating emitters are perfect; they are great for elevations or uneven situations. There are 3 different types of emitters: Laminar Flow Emitters use the friction of a long spiral passage to slow the water flow. Simply put, the longer or narrower the passage, the less water that comes out at the end. These are reliable and inexpensive, but are pressure sensitive, meaning the closer emitters to the water source will emit more water than those farther away. Non-pressure compensating emitters are best when you want to get water to plants but do not have a lot of pressure. Laminar flow emitters are not as consistent with its output but you can operate them as low as 5 pounds per square inch (psi). For example, 1 gallon per hour (GPH) (4L) emitters output is .5 GPH(2L) at 5psi, 1 GPH(4L) at 15psi, and 1 ½ GPH(6L) at 30psi. The higher the pressure the more water. Turbulent Flow Emitters are similar to laminar flow in that they rely on friction to control the water flow, but instead of a spiral path its path changes direction moving the water back and forth from top to the bottom outlet, as a more effective way of restricting the flow. Larger paths can be used making them more clog resistant, and less affected by pressure changes over the long runs. Turbulent flow emitters operate best within 8-50psi. When the pressure is lower than recommended they are no longer able to provide their intended rate of GPH Pressure Compensating Emitters can be either Laminar or Turbulent flow, but have a rubber disc or diaphragm at the beginning of the pathway. This pushes and relaxes against the inlet as the pressure changes, evening out the flow over a wide range of pressures. Inline emitters allow the water to flow through to the next emitter precise dripping exits the small hole at the side. When you want even distribution of water from one pot to another pressure compensating emitters are perfect; they are great for elevations or uneven situations. Pressure compensating emitters operate best between 15-50psi. Again, with any emitter when the pressure is lower than recommended they are no longer able to provide their intended rate of GPH. *GPH/L - gallons per hour/ litres per hour *PSI-pounds per square inch
When choosing the type of emitter and flow size you need to look at the water, soil type, sun vs shade, and type of plants. FLOW RATE AND PRESSURE First thing you need to check is how much water you have to work with and at what pressure? Flow Rate GPH = Bucket size / seconds to fill x 60= gpm x 60 x 0.8 pressure loss = GPH eg 5 gal bucket/ 50 sec x 60 = 6gpm x 60 = 360gph x 0.8 = 288GPH 18.925 litre bucket/ 50 sec x 60= 22.71 litres per minute average flow rate Determine your pressure by attaching a pressure gauge to your outlet. You may require an adapter to convert to the source you are using. Knowing your pressure is important because drip systems require a lower pressure than standard irrigation systems. Emitters can vary from operating at 5-50psi. Ideally, micro irrigation systems are designed to operate around 25psi. I usually have recommended a 30 psi pressure regulator allowing for friction loss. If your pressure is low to begin with or you are maximizing your water system by using the full GPH available you may not require a pressure regulator. Budget, pressure and flow will determine which type of emitter you use. Whenever a pipe is running down hill you will require pressure compensating emitters or a pressure regulator within the line itself in order to keep water within the system and not draining the line completely after each use. SOIL TYPE Water spreads and saturates differently depending on the type of soil. In sandy soil water doesn't spread far from the dripper and travels deeper, but will not saturate as well. Therefore, heavier application over a longer period works better. In loam soil the water spreads farther and retains the water better. This is your ideal situation. Lastly, in clay soil water spreads far, but won’t retain much water at one given time. Therefore, if I am using 1gph emitters in ideal loam soil then I would use 0.5gph for clay and 2gph for sandy as a guide. PLANT REQUIREMENTS Whenever possible we try to divide up sections of watering by their needs. Plants in shaded areas need less water than plants in sunny areas. Thus, we try to separate them into different sections(zones). Some plants require more water than others and are divided accordingly, such as a long hedge, a row of berries, fruit trees, small shrubs and most importantly pots and baskets. Since, it is not always possible to divide our plants specifically by their needs you can adjust the emitters accordingly. If one plant needs twice as much as the other plant, you can double the flow rate to the plant either by using a heavier flow emitter or increasing the amount of emitters. Always use a minimum of 2 emitters per plant for even root growth and to ensure that the plant is getting water if one of the emitters were to clog. Number of drippers per plant as a guide using 1gph emitters:  Emitters water in one spot and need to be on long enough to promote lateral movement. The type of soil can also determine the amount of drippers. Sandy soil needs more water and closer emitters.
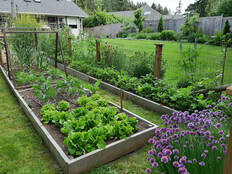
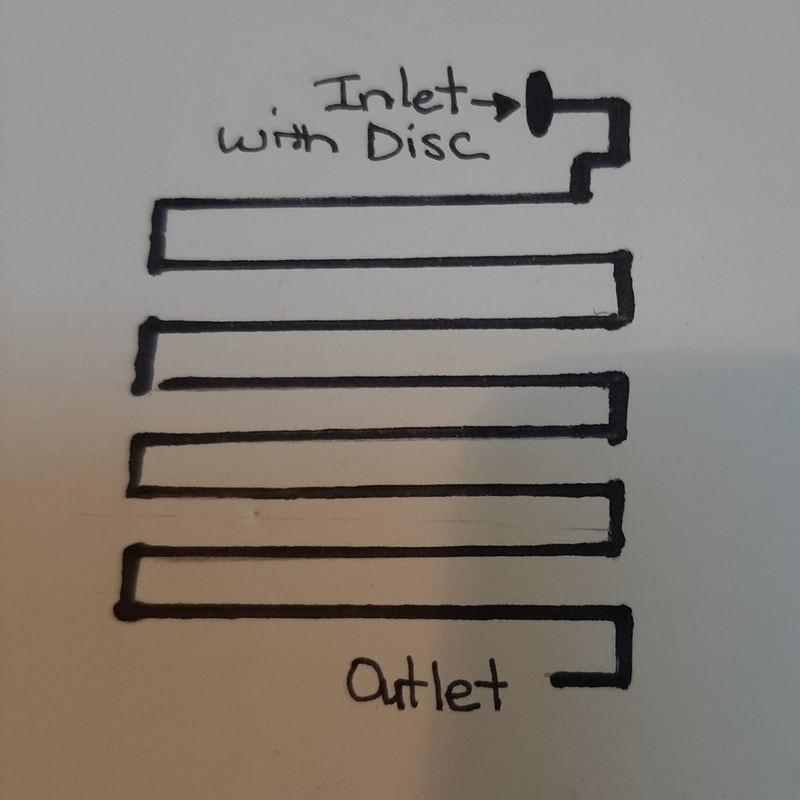
INSTALLATION Before running any drip system you should roll out the supply tubing next to or close to the plants to be watered. Flush out (run water through) the main distribution line before adding your drippers. Make sure to set each emitter 6”(15.24cm) from the plant to prevent disease and for better root absorption. When watering a tree always water about 25% in from the edge of the tree canopy ( where the outer layer of leaves end). You will know your water system, but most systems often require a filter to prevent particles from plugging the emitters. Screen filters are the most common filters and least expensive. They are great for removing hard particles such as dirt. They are not so great for removing organic materials such as algae, mold, slime and other unmentionables! For organic materials use a disk filter. WATERING Always water early morning to allow the roots a chance to absorb the water before the heat of the day. When you first install your system it is best to see exactly how water is permeating your soil, run your drip system for 30 minutes ( baskets and pots are different), and then shut it off. Wait 30 minutes, dig down below a dripper and around the plant to see the wetting area. You want the water to reach about 6”(15.24cm) or where the expected roots should grow to. You can decide from there whether you can decrease or add to the time. A quick way to determine how often you should water is by sticking your finger into the soil about 1”(2.54cm) deep. If the soil is dry, you can give it water. If the soil is still moist you can lengthen the time before watering again. Remember when the temperatures are over 90degrees you may need to increase the amount of water, just as when it rains or is cooler you may decrease the amount of water. CONTAINERS Containers need watering daily, and if the temperature reaches over 90 degrees it may need a second watering. Another consideration is the type of pot that you use. If the pot is made from terra-cotta, clay or wood for example you may require a second watering. Most of us are hard pressed to water daily let alone twice a day. Along with putting in drippers, add a mulch, and for smaller pots you could put a sponge at the bottom. By adding drippers you can give the planters what they need and when they need it. I have often found that they only require a couple of minutes of watering when watering daily. I would recommend using .5gph(2L) emitters for pots. As a guideline I would add an emitter every increase of 6”(15.24cm) in size of pot. Therefore if it is a 10” (25.4cm)pot it would only require one, but if it is a 15”(38.1)pot it would require 2 and if it was 20”(50.8) it would need 3 emitters. Lastly, if the soils water retention is poor you will need to increase to increase the size of the emitter. Pots can take some adjusting to get the right amount of water with so many varying sizes and styles. The beauty is you can make those adjustments! Emitters are great for their ability to provide water to plants where they need it, and how much they need. They use a small amount of water making them ideal for conserving water. There are several options such as non-pressure, pressure compensating, and gravity feed style emitters to suit everyone’s budget and needs. If you found this informative, I hope you will enjoy our blog on micro sprays. 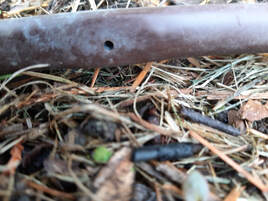 Having worked in irrigation for several years designing and helping others with their installation. I thought I would do a series on Micro irrigation. Micro irrigation is anything that is low flow, less than 20gph. It is controlled watering that's purpose is to apply water directly to the root zone, thereby minimizing evaporation. APPLICATION AND TYPES OF MICRO IRRIGATION Micro irrigation is useful for most situations including vegetable gardens, flower beds, hedges, trees and shrubs, hanging baskets, pots, green houses and other ground cover. The benefit of using micro irrigation is reduced weed growth, less soil impact from a slower application, reduced mildew and disease problems, less water loss, easier installation and overall health of plants. Over the next few weeks I will be discussing the use of drip line and tape, emitters, shrubblers and micro sprays. Having all of these in my own garden allows me to share what applications I prefer to use each product. I will then share some design and installation suggestions. DRIPLINE AND T-TAPE My focus this week is on drip line, with a brief discussion on T- tape. Drip line is great for hedges, borders, vegetable gardens, trees. etc. Where T- tape is often used for large gardens, farms or areas where there is very low pressure or flow. Following is a chart showing the standard types of drip line with explanation. I have not used any brand names and therefore there could be slight variances, but this will give you an idea of what is out there and its uses.  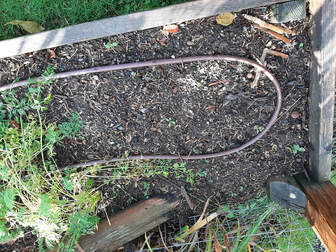 Note: There are drip lines that have copper or a chemical that inhibits root growth so that you can bury the drip line. I find that there is no place for this when dealing with edible plants and therefore do not recommend it.
*GPH/L - gallons per hour/ litres per hour **PSI-pounds per square inch ***it is possible to run 50ft of T-tape from the source as low as 2.17psi INSTALLATION TIPS These tips are just for the drip line and do not cover a full installation. I will go over a full installation after reviewing each of the drip products that are available.
On a personal note, I have found that whenever possible I prefer the 3 /8” dripline for vegetable gardens. The 6” spacing allows for a nice even flow and I start 6” in from the sides with 12” spacing between rows. The drip line has worked well for my narrow beds holding raspberries and blueberries. However, if I was to run a line along a hedge or where shrubs are spaced farther apart I would use the ½” dripline. I have found ¼” drip lines work well in long planters. For trees I would use either the ⅜ or ½” drip line making sure to install them at about 75% of the drip line or canopy of the tree(see diagram). Finally, T-tape has a much shorter life span compared to a drip line, 1-3years depending on care. The benefit of drip tape is its very low flow and long distances that it is capable of running. Make sure that the product fits the application and you will be happy with the ease, convenience and smart water usage of your drip line or tape. Come back next week to learn about emitters and their uses. |
AuthorDebbie Hall ArchivesCategories |
 RSS Feed
